Drones have opened a whole new dimension for photography and videography that allows you to capture epic, cinematic shots that were previously impossible to take unless you were in an airplane or helicopter.
Drones allow you to find angles and perspectives from the air that you just can’t find anywhere else.
The current generation of drones – such as the ones by DJI – are specifically meant to be aerial photography platforms and are designed to fly incredibly stable. You can also use your own action camera on a home-built platform. They also have great on board cameras and a whole host of ways you can control the camera and drone.
Over the past few years, as drones are becoming more and more popular, there are some types of shots that have become signature drone captures. In this post, we’ll talk about 16 types of photographs and video clips you can take with your drone for some truly epic shots.
I’ve tried my best to show examples from my own drone, but due to, erm, geographic limitations, I’ve had to find some of the examples online.
Before you get started with aerial photography, you must be mindful of local laws and regulations. You should also have an idea of how to fly your drone before attempting challenging shots!
For more information, check out our getting started guide.
If you’re looking to get a nice Aerial Photography drones, check out these resources:
We’ll start with videos, then move on to photos, and finish it off with tips for exposure and camera settings. Enjoy!
1) The “Slow Reveal”
The “Slow Reveal” is a video shot you can take with a gimbal equipped drone. The purpose of the shot is to reveal the landscape in front of the drone as it’s moving forward. This is a great way to showcase contrast between two landscapes(like a forest at the edge of a lake).
Note: You’ll need to fly while tilting your camera at the same time. Make sure your gimbal speed(adjustable in the DJI app) is at a level you are comfortable with moving smoothly.
To take this shot, decide on the initial subject of your shot, and what you want to show from it. Let’s continue the forest/lake example.
Let’s say you want to show how the forest suddenly transitions into the lake.
Get some altitude over the forest, and face the gimbal down so you’re just seeing the forest in your camera.
Slowly start flying forwards towards the subject you want to reveal, and start moving the gimbal up simultaneously. You may need to practice a little before getting this smooth.
With DJI copters, the control is very intuitive, as the gimbal wheel is on the shoulder of the remote, so you can easily turn the gimbal as you fly forward with the right stick.
Keep tilting the gimbal upwards until the subject is “revealed” in the shot.
You can also do the same thing in reverse, where the gimbal is facing forward, and you gain altitude as you slowly tilt the gimbal down.
2) The “Spiral”
The “Spiral” is a signature video shot you can take with a drone. It involves going straight up in the air while yawing steadily in one direction.
To set up this shot, bring your drone to a hover about a meter or so above the object you wish to spiral on top of. Note that the Mavic and Spark have “Spiral” as an intelligent flight mode, but honestly, it’s far more fun to do it manually 🙂
Once you’re directly on top, make sure that your shot is properly by pointing the gimbal directly downwards and making any adjustments.
Now start pushing the throttle stick up and to the left or right(depending on if you want to go clockwise or counter clockwise) and hold it steady. The copter will start gaining altitude and spinning at the same time, and as you’re spiraling, your subject will get smaller and smaller and more and more of the surrounding landscape will be revealed!
3) The “Chase”
The “Chase” is a video shot where you follow a person or object. Chase shots are very popular with motorcyclists and bikers, as well as mountain climbers and hikers.
Chasing something in a straight line is very easy and you can do it manually, but if you want to chase an object moving randomly(such as a soccer player) or down a winding path, then it’s best to allow the DJI software to do it for you!
The Mavic Pro and Spark both have tracking abilities, where you first tap on the remote control icon on the screen which brings up the Intelligent flight modes menu, and you can choose follow me(Mavic only) or ActiveTrack(Spark) and choose your subject. The drone will then do its level best to keep the subject in shot, adjusting its altitude, direction, and gimbal all automatically!
If you’re shooting manually, remember that you not only have to chase your subject, but also keep it in shot by adjusting the gimbal.
To chase safely, make sure it is in an open area with no trees/electrical lines/buildings nearby that you may crash into in your enthusiasm to keep the subject in shot!
4) The “Goodbyeeeee”
This is one of my favorite videos to take with a drone because you can do it nearly anywhere with any subject, as long as there is sufficient space in front of you.
The “Goodbyeeeee” shot is a video clip where you are hovering close to the subject, then fly backwards and upwards away from them. The subject will get smaller and smaller in the shot as you go higher up and further back.
To set up the shot, identify your subject(this is a great way to take a video clip of a “dronie”) and bring the copter to a hover near the subject(preferably nearly level with it). Make sure you’re a safe distance away, though!
Start recording, and push slight up on the throttle stick and slightly down on the right stick(in mode 2, default on DJI) and your copter will start to fly backwards and up away from you.
Go as far as you are comfortable, or for as long as you can still make out the subject in the shot!
5) The “Side Swipe”
The “Side Swipe” is a neat video clip you can record using your copter where you fly sideways parallel to a subject. To take this shot, find a subject that stretches out over a length – like a long building, or a row of trees.
Position yourself so that you are facing straight at your subject. You will be at one end of the subject.
Make sure you are completely parallel to the subject, otherwise you’ll either fly out and away from your subject or worse, right into it.
Point your gimbal at whatever feature you want to follow, and push the left stick in the direction you wish to fly. Go slow and steady to make sure you don’t inadvertently fly into the subject!
Keep flying until you reach the end of your shot.
The awesome thing about this shot is that even though your copter will be banked quite steeply to maintain sideways movement, your gimbal will correct the bank and it will end up being a straight shot.
6) The “Orbit”
The “Orbit” is a classic video clip you can shoot in which you’ll pilot the copter to go in a circle around the object, capturing it from all sides.
While you could take a picture at every 10-15 degrees, you can also take a video and then extract frames from the video into stills.
Orbiting manually is a bit challenging and can take some time to get perfect.
The ideal orbit is when you execute a perfect circle around the object. Sometimes you’ll end up doing an ellipse or an oval – the shot you want is a perfect circle!
To orbit, approach your subject and hover in front of it at the distance you wish to make the radius of your orbit.
Make sure that there is nothing else around or near that object within the radius(and a little more), as there are no sensors on the sides of the DJI copter(yet) that will prevent a side impact!
To start your orbit, push the two sticks inwards or outwards – give opposite yaw and roll. I recommend doing it very slightly, so you have control over the orbit and it looks more cinematic. To get the perfect orbit, you’ll need to keep your sticks exactly in the same position until you complete your circle. If you give even a little extra of one input on the sticks, it will no longer be a perfect circle.
Please note that pushing both sticks to the extreme corners on DJI copters will DISARM your quad and cause it to fall out of the sky.
Do this flight path VERY CAREFULLY!
7) The “Architect”
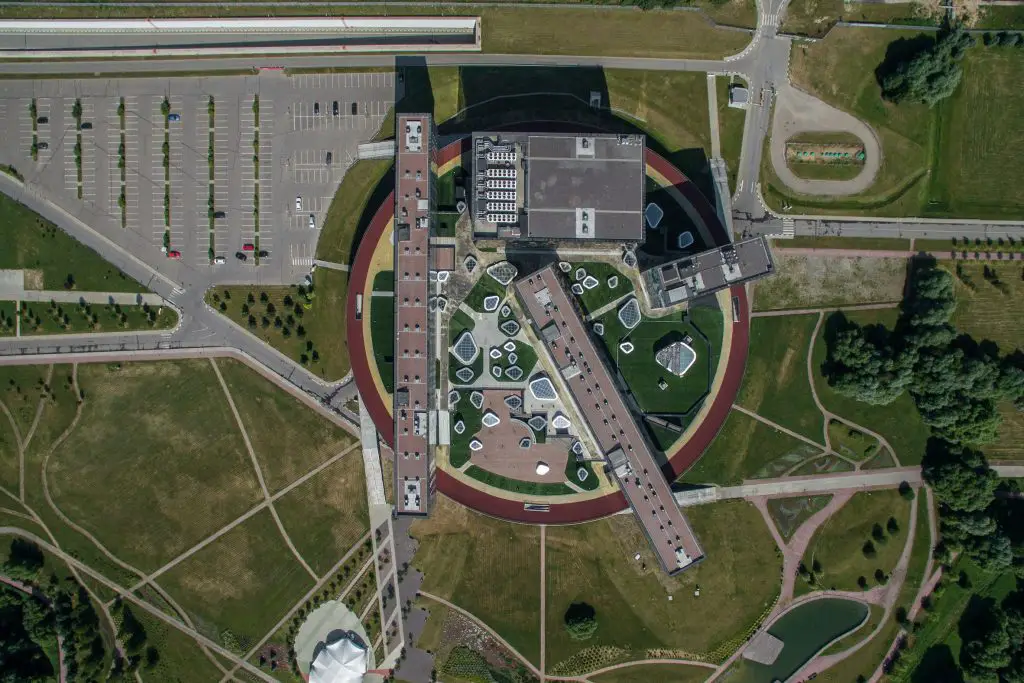
Image credit: Dezeen.com | Denis Esakov
The “Architect” is either a photograph or video clip in which the subject of your shot are the architectural features of a building. You have some flexibility here as there’s no single way to take this shot – however you are able to highlight the architecture of a building is fine!
One way I like to take a video clip in “Architect” style is to start at a hover near the base of the building with the gimbal parallel to the ground, and start gaining altitude steadily by pushing up on the throttle stick. Keep the gimbal parallel until you near the top edge of the building. As you near the top, start tilting the gimbal down – but maintain the upwards motion. You’ll get a really neat shot as you will be moving up while the camera is tilting down at the same time.
Another way to take an “Architect” photograph is to find an angle in which the building you’re trying to shoot comes fully into frame, but the surrounding buildings are barely visible. It’s not always going to be an easy shot to take, but you should be able to find a good angle from the air!
8) The “Dronie”
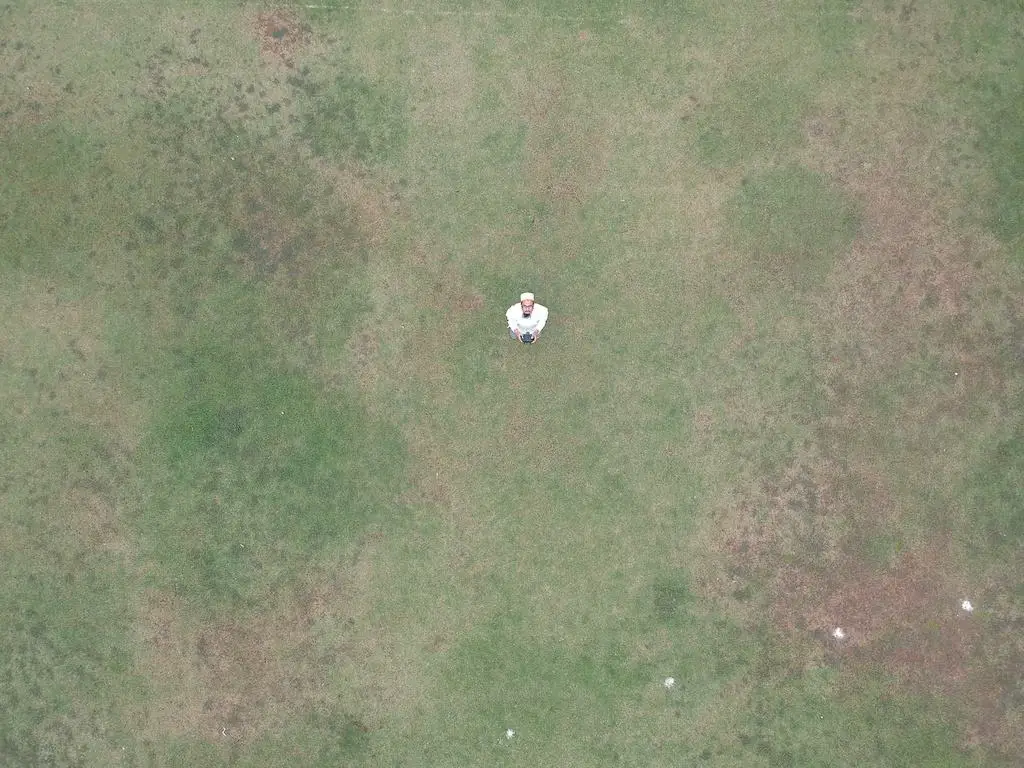
The signature drone photograph, a dronie is a selfie taken from the air.
There are a bunch of ways you can take a dronie.
- Go directly overhead and face the gimbal downwards. Look up at the copter, and smile 🙂
- Go directly overhead, face the gimbal downwards, and let go of the sticks – you must be in GPS mode(or P mode) – and the copter will hold it’s position. Lie on the ground and become part of the landscape. Take an epic photograph!
- Go up and away at an angle from yourself so the drone is at a 45 degree angle to you. Smile 🙂
9) The “Sun Salute”
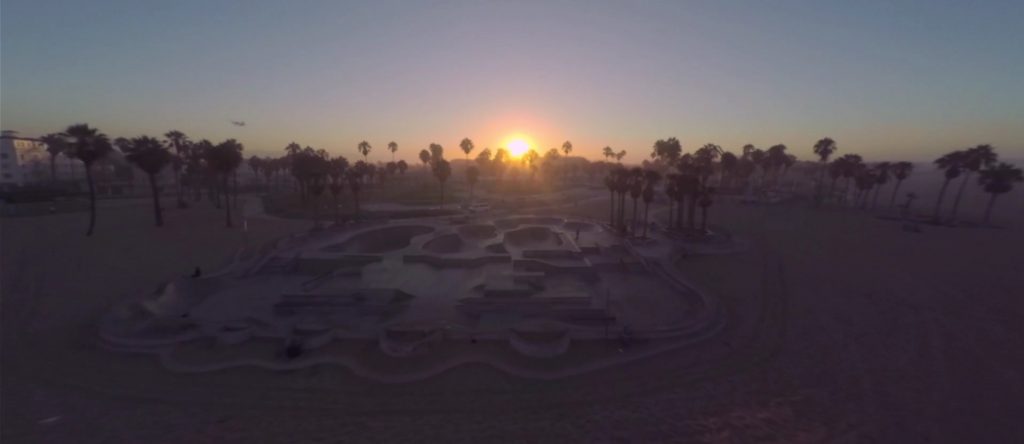
Image credit: Autoevolution.com
The “Sun Salute” is a drone photograph in which you capture the sun just poking out of an object on the horizon. This shot can be used to take epic images of landscapes or even cities and buildings.
To get this shot right, you’ll need to go at the right time of day – whether that’s sunrise or sunset – and capture your shot at just the right time depending on the position of the sun.
The extra altitude will allow you to spot the sun even if something directly in front of you is blocking it.
You’ll also have to adjust your exposure settings to make sure the photo is not too bright nor too lit as you’ll need to capture both the sun and the rest of the picture with sufficient light. If your camera can’t take multiple exposures or RAW images, manually capture 5 to 6 images with varying exposure settings and then combine them in post processing or choose the best one.
To set up, decide how you want to capture the sun relative to the rest of the photo.
Do you want it poking out of a small crack?
Do you want it touching the horizon and its light spreading across?
Do you want the sun blocked, but its rays coming out through a small opening?
Once you’ve decided the shot, get to an altitude where the sun is in position with the rest of your shot, and click!
10) The “Angle”

The “Angle” is a photograph in which you showcase a unique feature in the landscape which forms 90 degree angles in some way.
Examples could be:
- One colored basketball court in between multiple asphalt courts(the courts will all be at angles to one another)
- A grid only visible from a drones-eye view
To set this shot up, you’ll have to be creative in the way you look for unique features in the landscape. As you fly around interesting places, just move your gimbal down every so often and keep an eye out!
11) The “Wave”
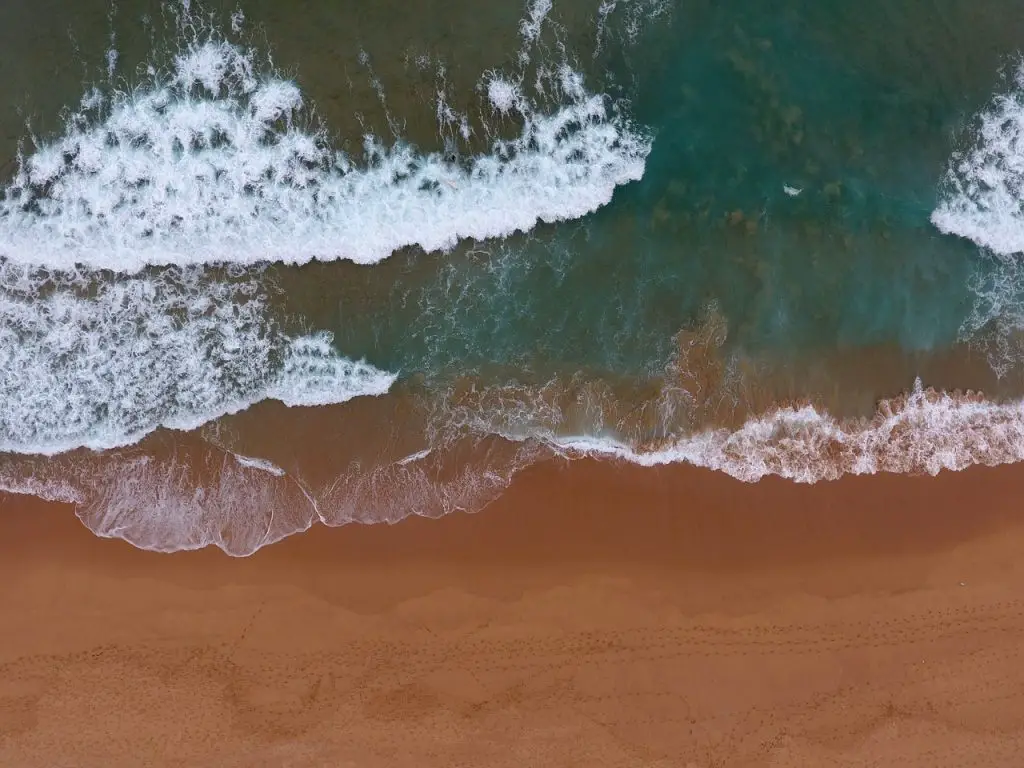
The “Wave” is a classic beach photograph you must take at some point in time with your drone!
The “Wave” is a photo pretty much split down the middle – half of the photo is water, and the other half is the beach, and the best moment to capture the photo is right as the wave crashes on to the beach so you get foamy water spreading out across the sand.
Be careful when you are flying near the water, as winds are generally stronger at coastal areas and THERE’S (almost) NO WAY TO RECOVER A QUAD YOU CRASH INTO THE WATER!
12) The “Symmetry”
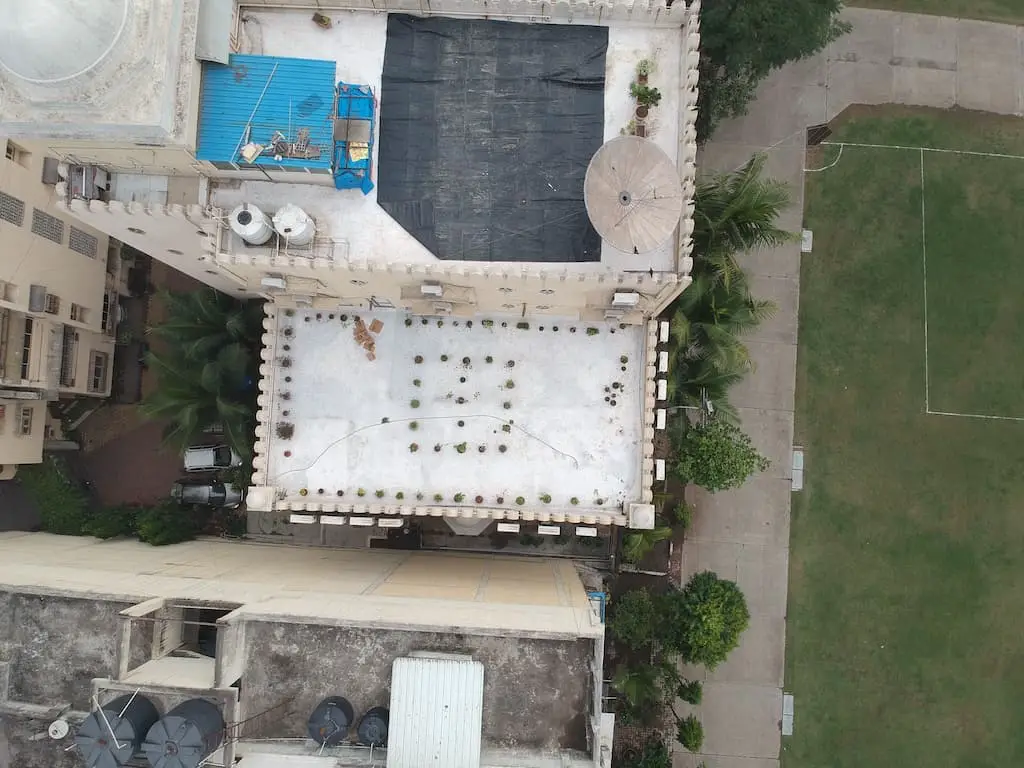
The “Symmetry” is a shot you can take to show symmetry and patterns in a landscape. This is a great way to showcase parts of cities or farms and orchards.
Taking this shot is quite simple – you just have to gain enough altitude, point the gimbal downwards, and take your photograph.
The challenge with this shot like many of the others in this list is actually finding symmetry! You’ll just have to fly around and keep an eye out for features like this in the landscape.
13) The “Jumble”
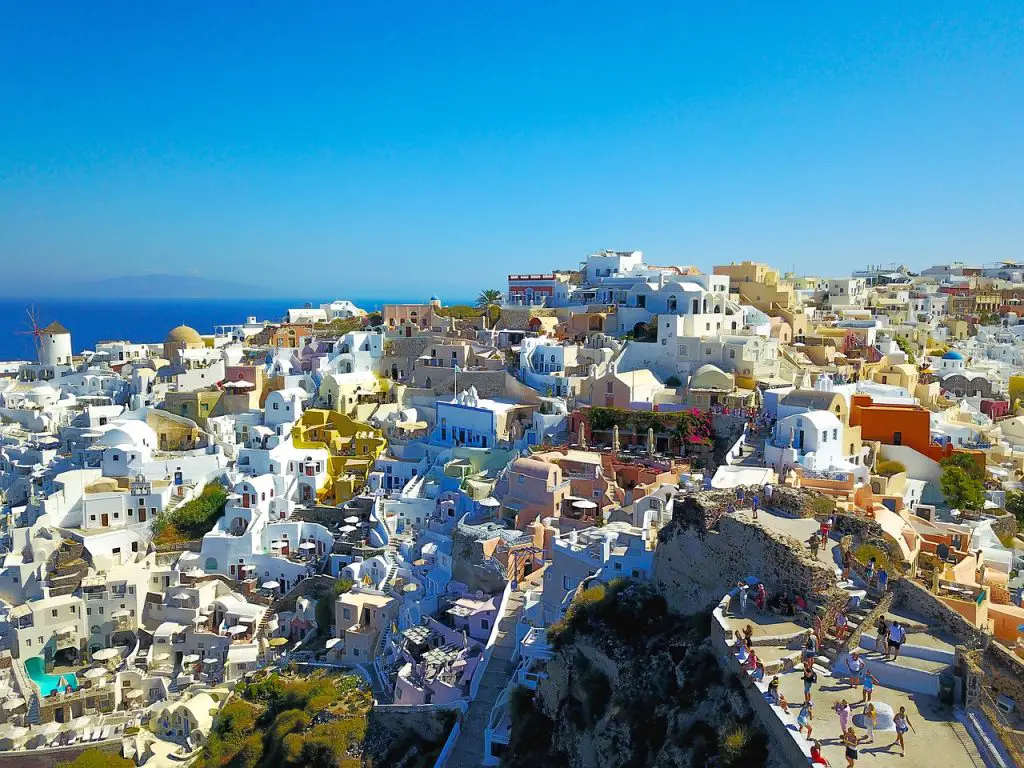
The “Jumble” is the opposite of the “Symmetry”. For this shot, you want to show chaos in the landscape – whether it’s a mess of roads, buildings, trees, or a winding river.
Old cities are rife with jumbled, winding roads, as are mountainous areas, so these places are ideal for taking these shots.
Like the setup with the “Symmetry”, to capture a good “Jumble” photograph, you’ll just need to scout the area from a good altitude with your gimbal pointing downwards and keep your eye open for striking features.
14) The “Majestic”
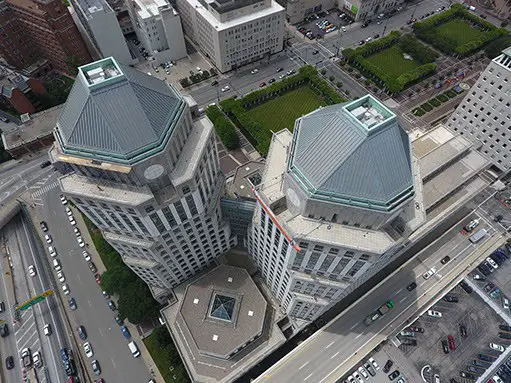
Image credit: Structure Tec
Sometimes, you’ll come across a structure or feature that is just TOWERING over everything else, or looking much grander than everything else in its surroundings.
In that case, you may want to capture a photo I like to call the “Majestic”.
Your photograph would highlight how your subject is standing out majestically from its surroundings.
Good subjects for “Majestic” photographs include:
- Castles
- Mountains
- Skyscrapers
- Mosques
- Churches
- Citadels
- Tall trees
- Rock formations
The key to capturing a “majestic” photograph is to get your shot in a way that makes the subject truly stand out.
15) The “Forced Perspective”
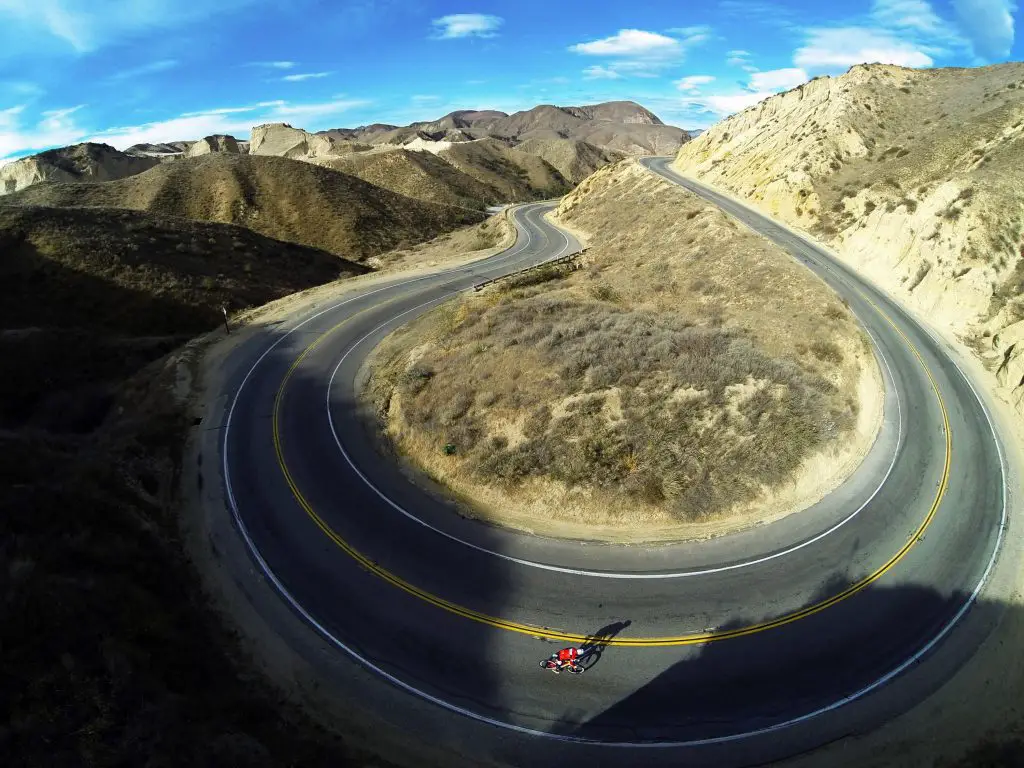
Image credit: Red Bull
In the “Forced Perspective” you are taking advantage of the fact that you can position your camera nearly anywhere you want. You can use your flexibility in positioning to make things look like they aren’t by taking pictures at angles that make certain objects look bigger than other (bigger) objects.
Kind of like how you take a picture of someone extending their hand out towards you and the hand seems bigger than the rest of their body!
With forced perspective, it’s a lot of fun to highlight certain features of a building – you can make one part of it seem far larger than the rest of it.
To take this shot, you need to fly around the building at varying distances until you get a good angle, and click away!
For more information on forced perspective, check out this great post by Digital Photography School.
16) The “Lone Ranger”
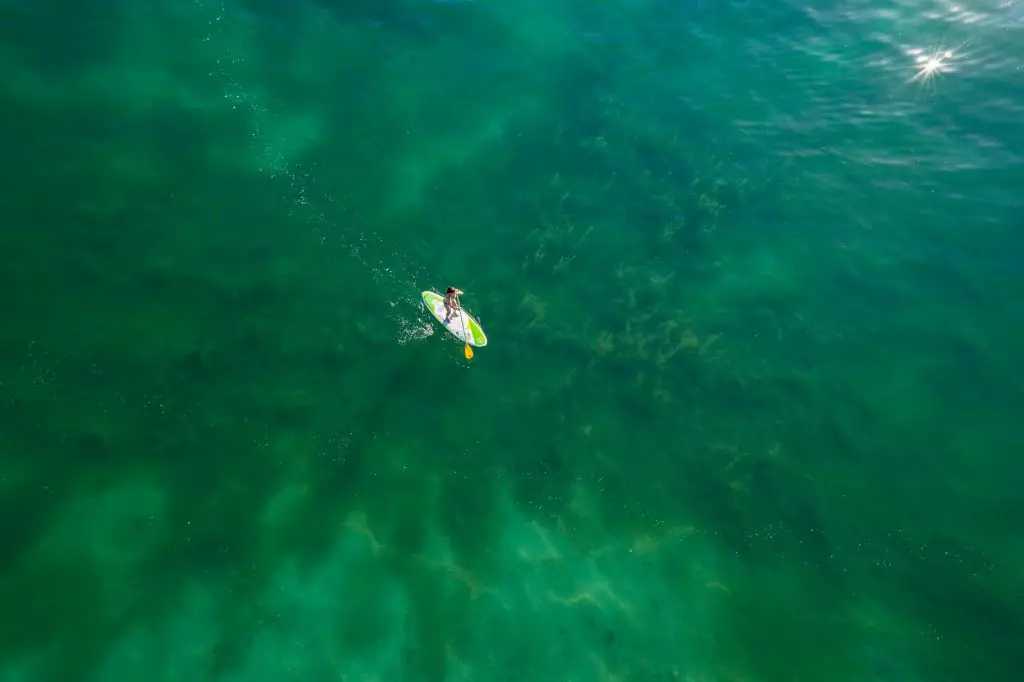
Image credit: Red Bull
This is a really neat shot you can take of a single anomalous object in a nearly uniform setting. Examples would be one odd looking tree in an orchard of similar trees, or a lone paddleboarder in the middle of the ocean.
These pictures are really striking because everything else is so similar and only one object is different.
Setting up these pictures is a little tough because some of these vistas will only become apparent once you are actually in the sky!
To get this shot in an unknown area, you’ll just have to cruise around and keep your eye open for anything interesting!
Tweaking your camera settings
As every photographer knows, to get the best shot, you need to play with manual settings. Most DJI drones have manual exposure and shutterspeed settings you can utilize to adjust your shot.
Things to factor in are the time of day(or night), ambient light, shadows, and whether your subject is moving or not.
In the DJI app, adjusting the exposure settings will automatically change the image on your screen, so you can get a good idea then and there how your shot will turn out. For example, when I had the shutterspeed too slow on a sunny day, the entire image was whitewashed! I had to lower the shutterspeed and ISO until I got a satisfactory shot.
The best advice I can give you as far as camera settings are concerned is practice, practice, practice!
What are your favorite drone shots? Share with us in the comments!
And if you enjoyed this post, please share it on social media!
Excellent article! Lots of great ideas for those who are new to drone cinamatography or photography.
In fact there’s something for regular photographers here – that ever important reminder to seek new points of view.
Thank you Simon! You hit the nail right on the head about seeking new points of view 🙂
Wonderful article on what you can do with a drone. Well illustrated. While most articles only deal with drones. Yours talks about drone’s capability. You have ably compared each one of the major drones and how they are able to get various angles as well as the moves to make the drone photography both interesting and fun.
Very nice 🙂
Thank you very much sir! 🙂
Great article Shabbir. This work shows your passion and ability for the art and science of droning!
Wow! Great Article you’re so passionate in it and thanks to that I learn most of the basic and given me some ideas. Thank you so much for this article.