If you’ve read my post on choosing an RC transmitter, you know I wholeheartedly recommend the Taranis X9D. However, I started with the Turnigy 9X, and it was a good starter radio especially if you are on a tight budget.
Note: Wrong transmitter? Check out our page on Taranis mods.
What’s good about the Turnigy 9X(also known as the Flysky 9x) is that there is a lot of scope to expand and upgrade the radio, and you can ultimately make it as good as a Taranis.
I was actually in the process of doing all of those upgrades when I realized I would be spending as much on the upgrades as I would be on the Taranis, so I sold my 9X , saved a little, and got a Taranis instead:p.
But if you enjoy taking the DIY route, or if you want to space out your upgrade purchases, here are some of the things you can do to really spruce up your transmitter.
Upgrade 1: Add a backlight
A really annoying thing about the Turnigy 9X is that there is no backlight on the display, so it is very hard to see the screen in certain light conditions.
Adding a backlight is fairly simple, and HobbyKing even sells a backlight specifically for the 9X. The HobbyKing backlight costs just $5 plus shipping and is very easy to install – you don’t even need to solder anything.
Upgrade 2: Add a module
The protocol used by Turnigy/FlySky is not the best. The most range you will get is around 500 meters, and it’s not the most reliable in the world, either.
Luckily, the Turnigy 9X has a module bay in the back, so you can pull out the stock module and replace it with a module from another protocol like DSM/DSMX or FrSky(I prefer FrSky).
Especially if you are using your 9X to fly miniquads, modules will allow you to use really small receivers on your model. The FlySky/Turnigy modules are just too big to comfortably fit on to a miniquad.
The most common modules you can use are:
HobbyKing OrangeRX module(compatible with Blade/Horizon products and DSM/DSMX receivers)
FrSky DJT Module(compatible with V and D series receivers like D4R-II)
FrSky XJT Module(compatible with X series receivers like X4R)
Installing the modules requires a little bit of DIYing, because the Turnigy 9X antenna is soldered to the module, so you can’t remove the module unless you disconnect the antenna. This is a bit of a design flaw with the 9X. There are however versions of the 9X available that don’t have a module in them, so you won’t have an issue if you use those.
Dennis Baldwin does a great job of showing you how to install the DJT module. You can follow his guide to remove the module and install any of the other modules.
Upgrade 3: ER9X Firmware
The stock firmware in the Turnigy 9X is pretty bad. It’s very limiting, and even lacks basic features like a timer, and has limited capacity to store models.
Upgrading the firmware is an advanced mod, as you’ll have to do some really fine soldering and you’ll also have to cut out a part of the plastic in your transmitter’s casing to install a little plug that you’ll use to hook up the radio to your computer.
This video by BMSWEB takes you through the whole process of the upgrade:
The easy way
This upgrade will cost you around $5-10 for the tools and parts, so it’s pretty cheap. However, if you not comfortable with very fine soldering(you’ll be soldering on to the processors in the transmitter – a little too much solder and you’ll be bridging unwanted pins and causing a whole lot of trouble), there are easier ways to upgrade.
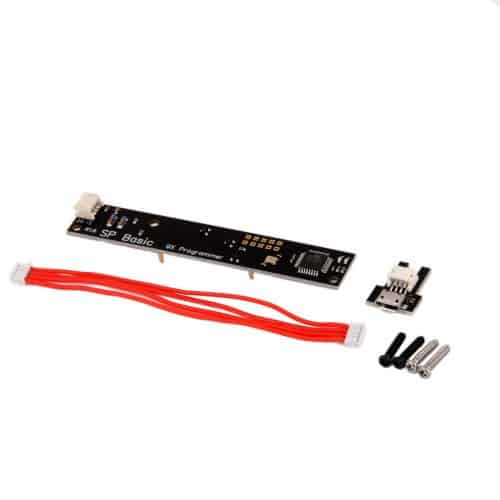
The SmartieParts SP Basic is a little board that just bolts on to the back of your transmitter’s motherboard. The metal contacts automatically touch where you would have soldered wires manually, and you can just use a simple microUSB to hook it up to your computer and upgrade the firmware.

At $17, it’s a steal, especially since you would be spending around $10 for the parts anyway.
Upgrade 3a: New firmware and telemetry
If you want to use telemetry(receiving data from your model to your radio), you’ll have to do some more hacking. For DIY telemetry, you’ll need the FrSky DHT module, which is like a DIY version of the DJT module(which is plug and play).
Getting telemetry to work involves cutting traces on your transmitter’s PCB board and doing a lot of fine soldering.
This guide from RCHacker takes you through all the steps.
The easy way
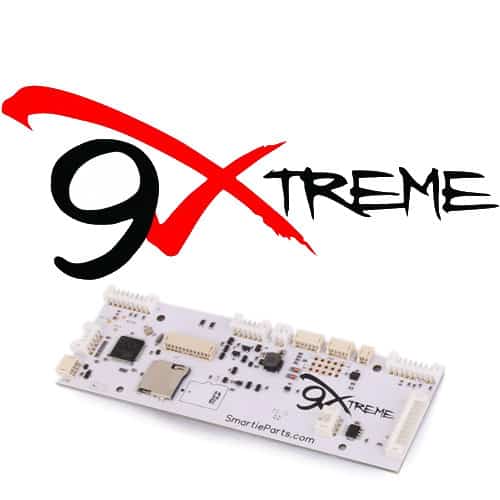
If you’ve got the budget, the SmartieParts 9Xtreme board does all of the upgrades we’ve seen so far.
You get a backlight, you get new firmware, you get telemetry, and as a cool bonus, you’ll also get a little speaker for voice feedback like the Taranis. How cool is that!
The 9Xtreme is a little pricey at $69, but it’s very easy to use(just bolt it on your board like the SP1) and will instantly supercharge your Turnigy 9X into almost a Taranis.

Upgrade 4: Rechargeable batteries
The Turnigy 9X uses AA batteries out of the box. The batteries run out very quickly, and it’s a pain(and costs add up) to keep changing the batteries.
However, it’s very easy to mod your transmitter to use a LiFe or NiMH battery:
Upgrade 5: New gimbals
The last upgrade you can do is to switch the stock gimbals(sticks) on the Turnigy 9X to higher quality ones. The stock gimbals are not the best. They are quite stiff, and while OK to learn on, as you get better at flying, they will start feeling really slow and sticky.
Modding the gimbals is fairly simple, and you can find new gimbals from Aurora radios for around $40 for the pair.
Leave a Reply
You must be logged in to post a comment.