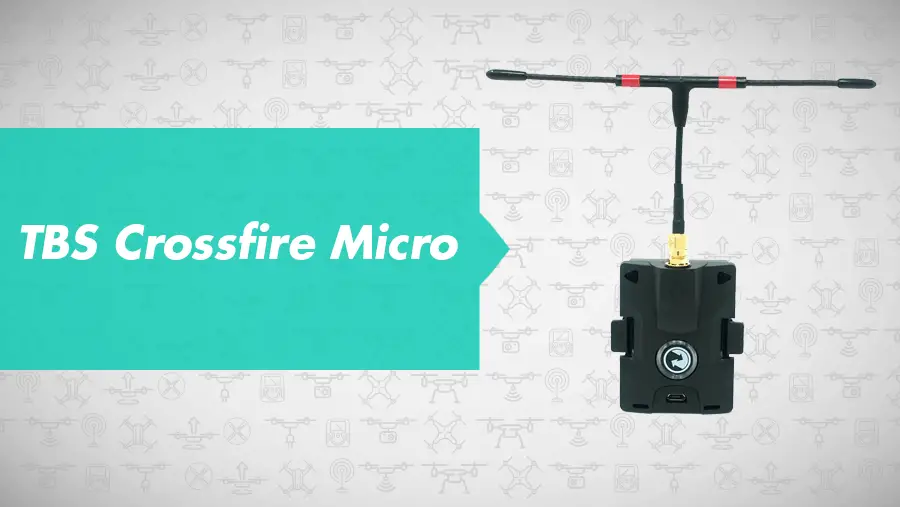
So you’ve jumped on the long range bandwagon and picked up a TBS Crossfire micro transmitter module.
Don’t have it yet?
Get one from GetFPV
Get one from Amazon
Already have it? Awesome!
If you’ve got a Taranis QX 7 or Taranis X9D, there’s a few steps you need to take in order to get it working – but it’s pretty straightforward.
Updating the firmware on your Taranis
Whether you have a Taranis QX 7 or X9D, you will need to update your firmware to OpenTX version 2.2.X.
To do that, head over to the “Nightly builds” section of the website(on the download page here) and download a version – you can choose any of the builds as long as they are 2.2.something.
Please note that these are BETA builds and you are using them at your own risk!
You’ll also need to download the SD Card contents.
Once you’ve downloaded the OpenTX companion, fire it up, and click the little gear button to bring up the preferences menu.
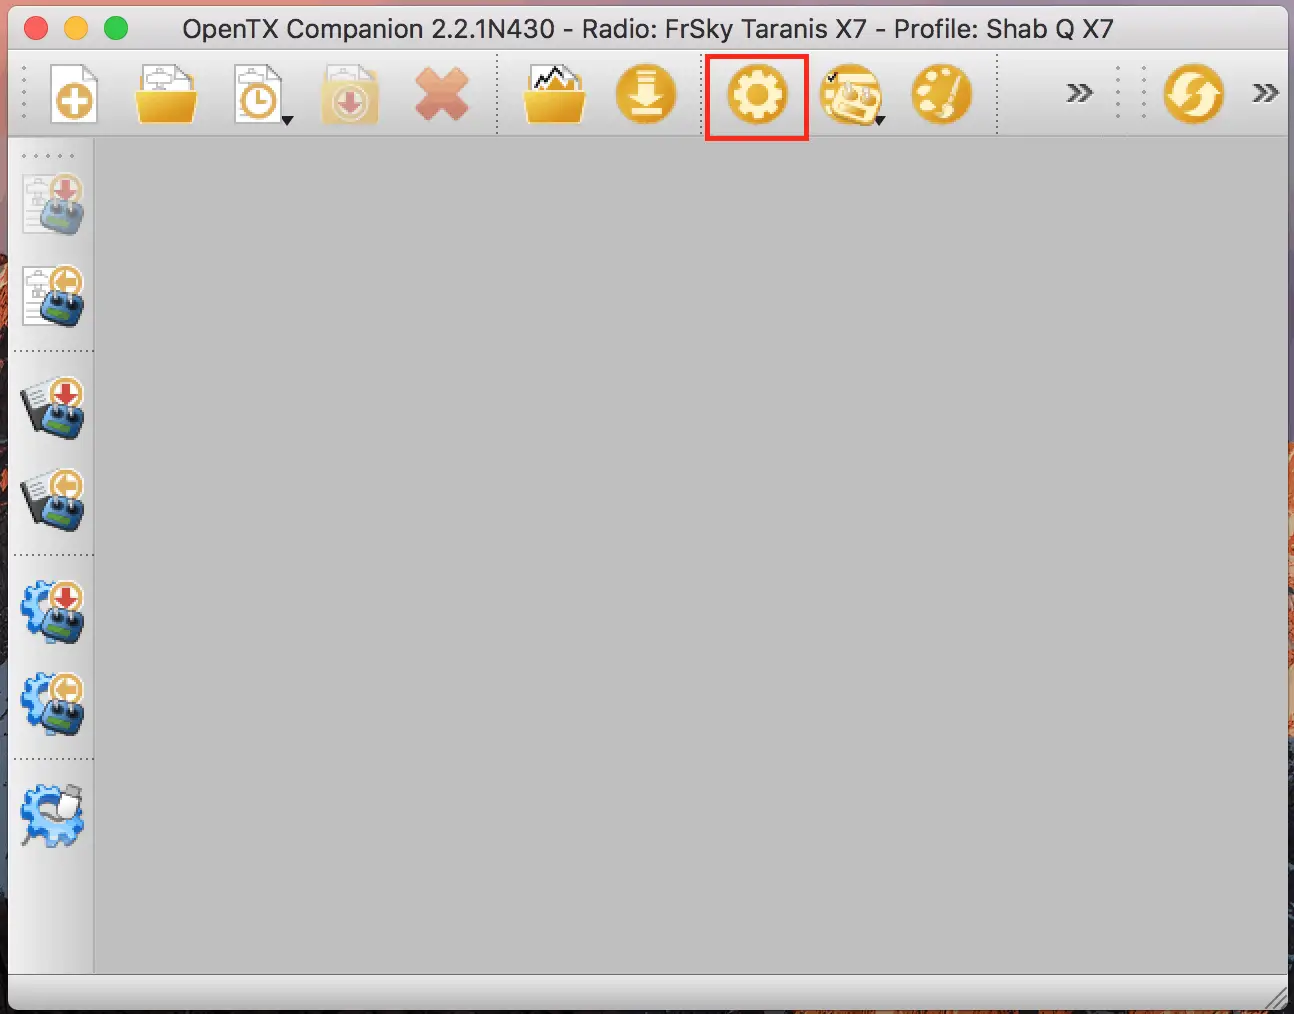
On the first screen, make sure the “Lua” radio box is checked.
Then at the top, select the “Application Settings” tab, and on that page, check the “Use firmware nightly builds” button.
Now get your transmitter and a USB cable.
Hold the two horizontal trim switches towards one another, and power on. You’ll see a screen that says:
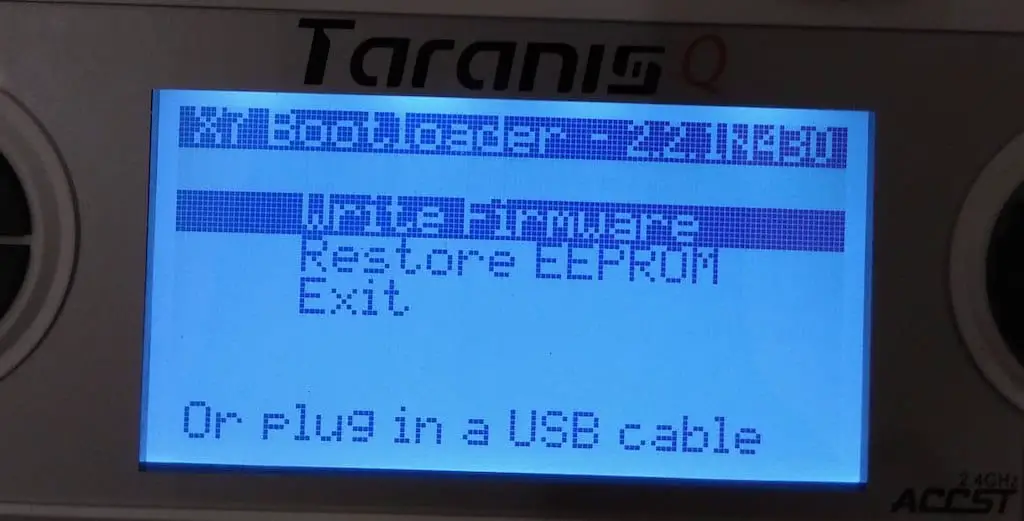
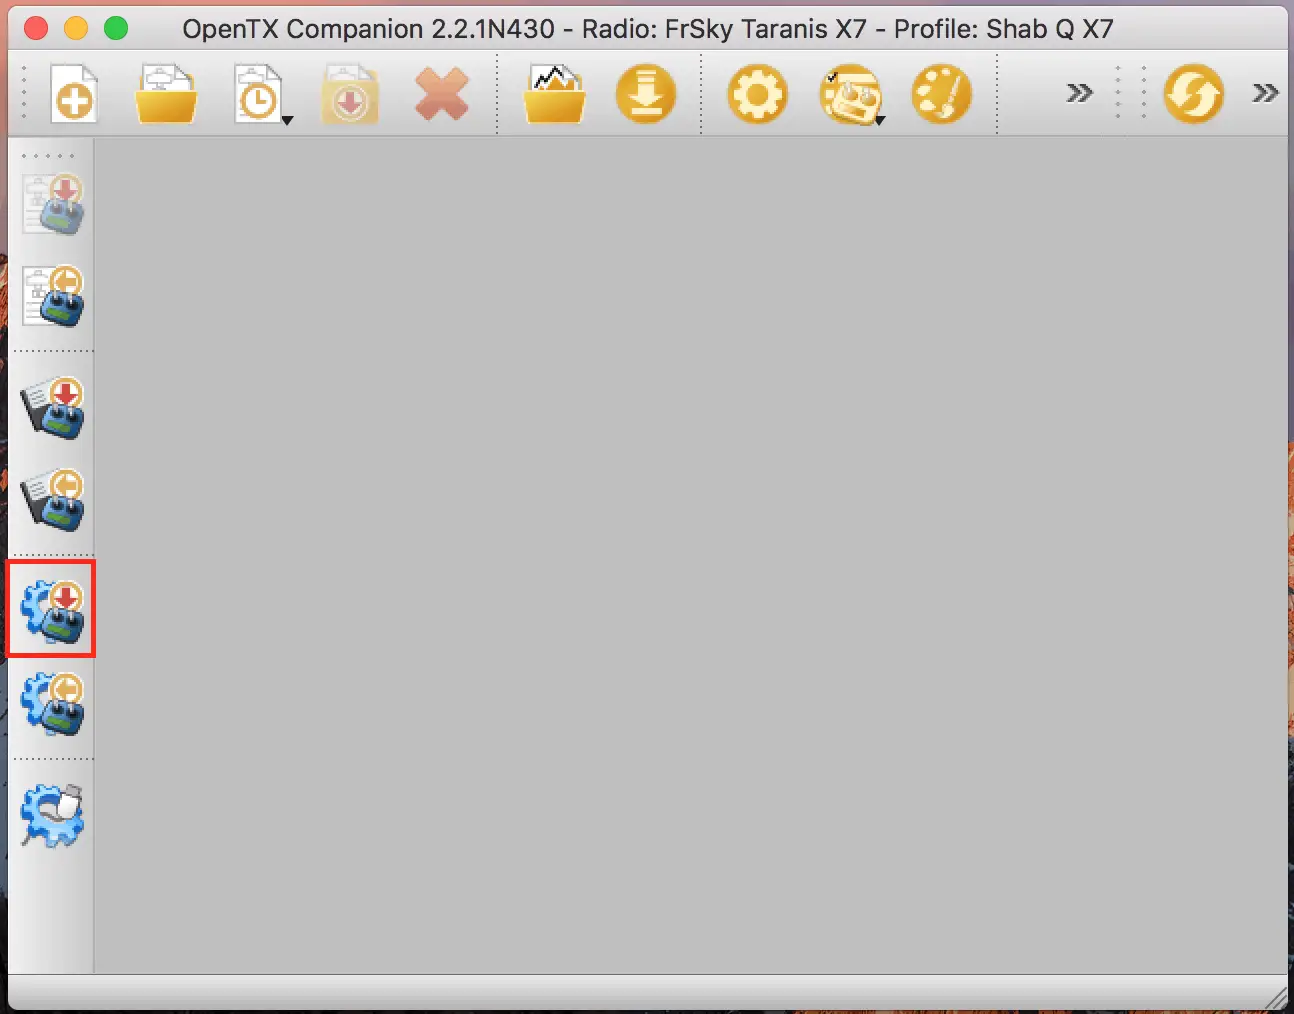
Plug your USB into the Taranis and into your computer, and in OpenTX Companion, press the button with the gear, radio, and red arrow – which is to write firmware to radio, and follow the instructions to download the firmware, and write it to your radio.
Congratulations! You are now on a version of OpenTX that can handle the TBS Crossfire Micro!
There’s still a few more steps you need to take.
You would have downloaded the SD Card contents file, so unzip that file, and copy the contents over to your SD card.
Note that your SD card may show up as two separate drives – one called Taranis, which has just two files in it, and another one(name will vary) which has all the folders. Copy into the one with the folders, and overwrite.
Note: If you have any existing LUA scripts or sound packs, don’t copy the scripts or sounds folder.
Finally, copy the firmware file that OpenTX Companion downloaded to your computer into the “Firmware” folder on your SD card.
That’s it for the computer and the radio – we’ll be updating the Crossfire module later, so for now, unplug the Taranis.
Now, restart the Taranis normally(without holding trims) and once it’s started up, long press the Menu button to go into the main radio menu. Press Page until you can see the folders in the SD card, and open up the “Firmware” folder, and long press Enter on the firmware file you copied to the SD card.
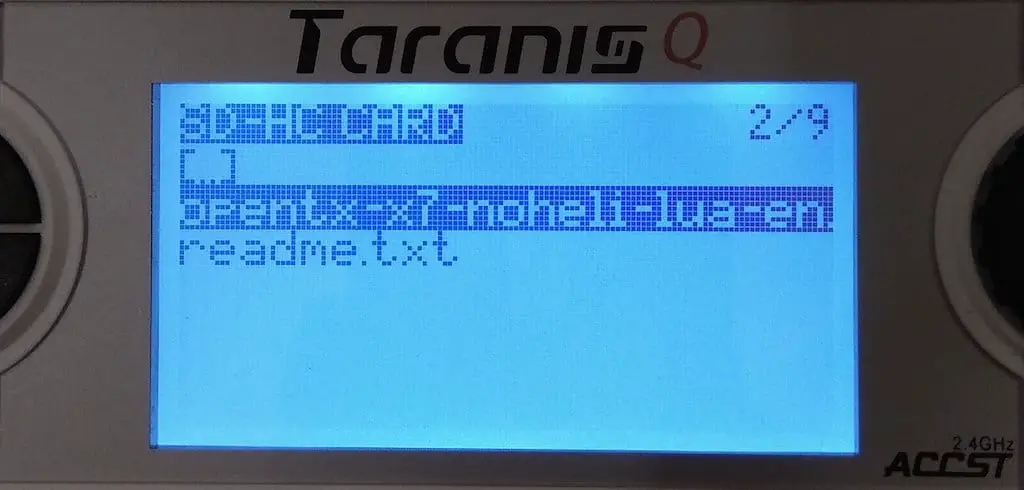
The Taranis will ask if you want to update Bootloader – press Enter to confirm, and it’ll take a moment to do its thing.
At this point, you’re ready to get to the Crossfire!
Setting up the TBS Crossfire Micro
At the back of your Taranis Q X7 and X9D, there is a little hatch that opens up to reveal slot for inserting a module.
The TBS Crossfire Micro will snap into that – insert it all the way until the little tabs click. Screw on the antenna that came with the Crossfire, and power on your radio.
Once the radio is on, press the Menu button once to reveal the list of models.
Head down to an empty slot and create a new model.
In the model configuration screen – the first one that shows up – scroll down until you see the option for “Internal RF”. Below that, you’ll see something like D8, D16, or the like. Press Enter on that option, and scroll until you select “OFF”.
Below that, there is an option for External RF.
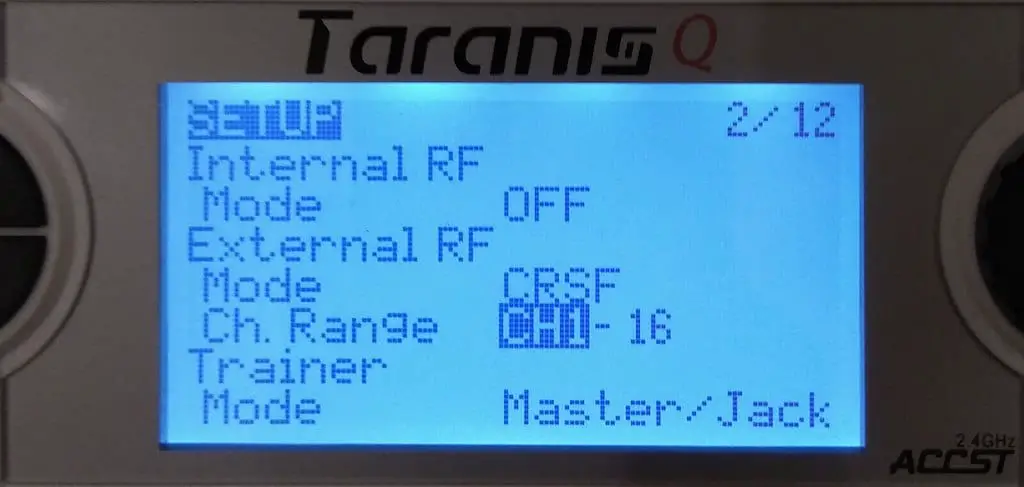
Turn that on, and new options will pop up below that – on the “Mode” option, press Enter and scroll until you select “CRSF” – this is the TBS Crossfire protocol, and select the channel range – you can keep it 1-8 or 1-16, but 1-8 is more than enough for a miniquad.
At this point, you may wish to update the firmware on your TBS Crossfire Micro.
This is very easy to do – simply download the TBS Agent firmware utility from here, install it, and plug a USB cable into the little USB plug on the Crossfire module.
Open up the TBS Agent, and follow the instructions to update the firmware. This step will take a while so be patient until it’s fully complete.
Once that’s done, you can now move on to start binding your Crossfire to your receiver.
Wiring up the TBS Crossfire Micro RX
The TBS Crossfire Micro receiver is a fantastically tiny receiver that still supports the entire Crossfire Protocol – and wiring it up is super easy.
Regardless of whether you are using Betaflight, Raceflight(use UART3 on Raceflight boards), or KISS, you can use the following instructions to set it up.
With your Micro RX, you should have receiver some cables – I like to use SmartAudio on my quads, so I’ll use the cable that has all the wires in it.
On the receiver, you’ll see what each wire is supposed to do.
The first wire is GND, which you can wire up to any GND pad on your flight controller.
The next wire is 5V, which you can wire up to any 5V pad on your flight controller.
The next(third) wire is Channel 1, which is the Transmit wire(radio signals will come on this wire), which you need to wire up to any free RX UART on your flight controller.
The next(fourth) wire is Channel 2, which is the Telemetry wire, which you’ll wire up to the same UART’s TX port.
Eg: If you use RX3 for Ch1, use TX3 for Ch2.
Finally, if you wish to use SmartAudio, then hook up the last Channel 4 wire directly to the SmartAudio wire on your video transmitter.
Binding the Crossfire transmitter and receiver
To bind the Crossfire to your transmitter, you can do it using the large button on the back of the module, or do it through the Taranis LUA script.
I’m going to show you how to do it through the script.
Start up your Taranis, make sure the model which you’ve configured to use the TBS Crossfire is selected, and long press the Menu button to go into the main transmitter menu.
Press page until you see the folders and files, and open the folder called “Crossfire”.
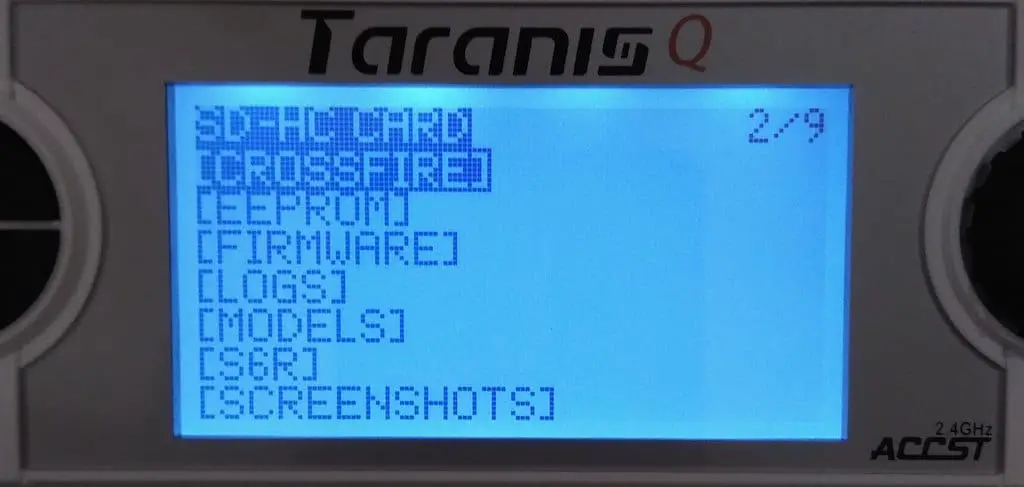
Inside, there will be a file called Crossfire.lua.
Long press enter to run the file.
It should now detect your Crossfire module and present you with a menu to choose between the TX or the RX.
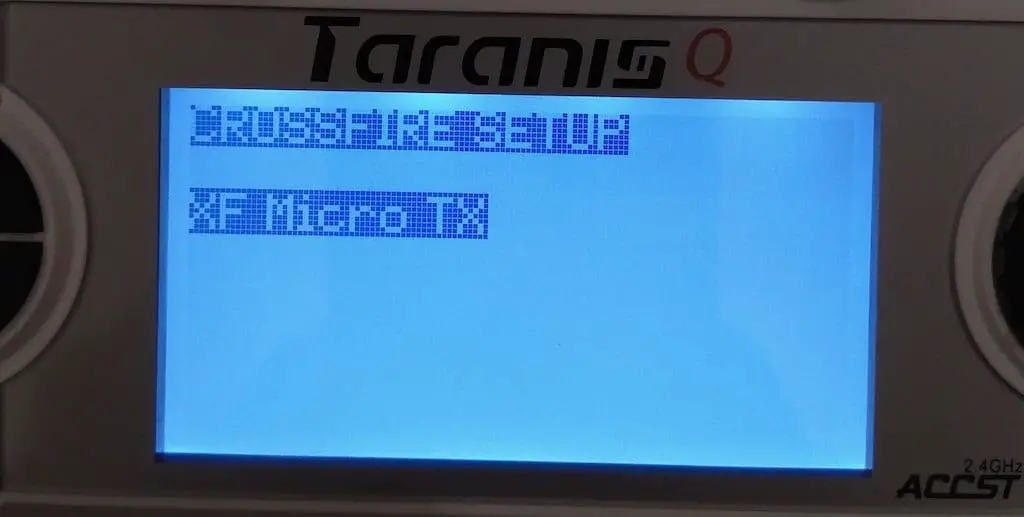
Note: If you are running a Taranis Q X7, you may just get a message that the radio is looking for the Crossfire module. If this is the case, make sure that
- Your Taranis Q X7 is running the latest nightly build
- Your TBS Crossfire Module has been updated to the latest version
If that still doesn’t do the trick, download these scripts by GitHub user OhmEye and replace the existing scripts in the Crossfire folder with these. Run the script again and it should now work.
One of the options on the menu is “Binding”.
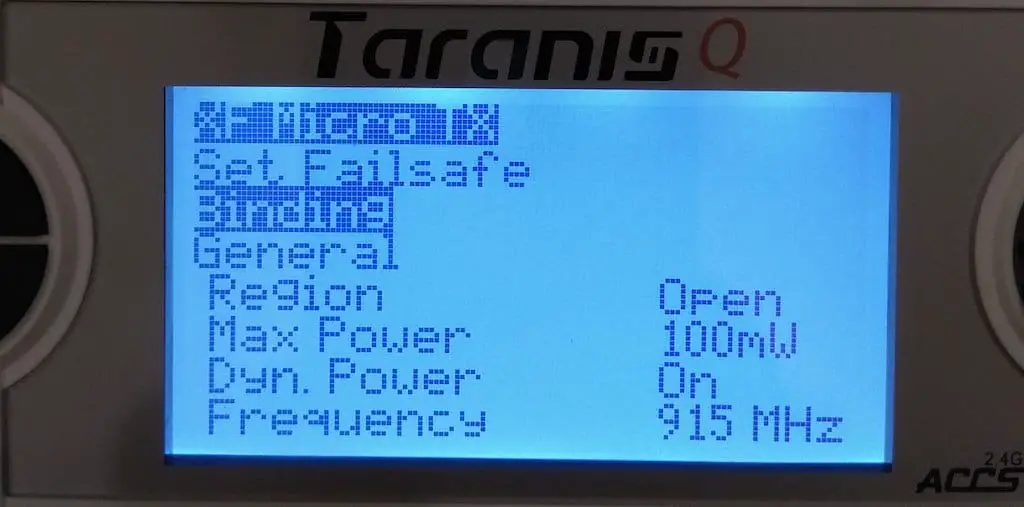
On your micro receiver, there is a single bind button – power the quadcopter up and you’ll see a red light on the receiver. Press and hold the Bind button on the receiver until the light starts flashing.
Then, on your radio, press the “Bind” button in the menu we just navigated to – the light on the Module will start flashing green, and so will the light on the receiver.
Once both lights are solid green, the receiver is bound to the module!
It may ask you to update the receiver – go ahead and update it. Wait for a few seconds for it to complete, and you’re done.
You can also change settings here such as the region and the frequency you are running. Make sure you are running a frequency that is suitable for your country – check with local hobbyists to make sure you’re using the right one!
To set the failsafe, first make sure the receiver is powered on and bound to your transmitter, then head back into the folder housing the Crossfire script and run the script.
Now you’ll see an option for XF Micro RX. Open that.
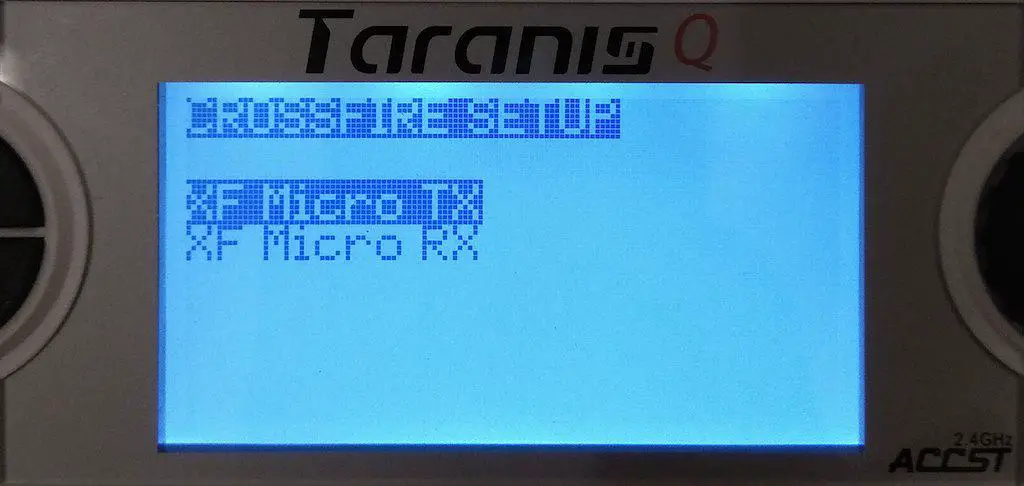
Scroll down to where it says Failsafe Mode, and set it to Cut. This will kill the signal as soon as the link has broken, so your quad will drop out of the sky.
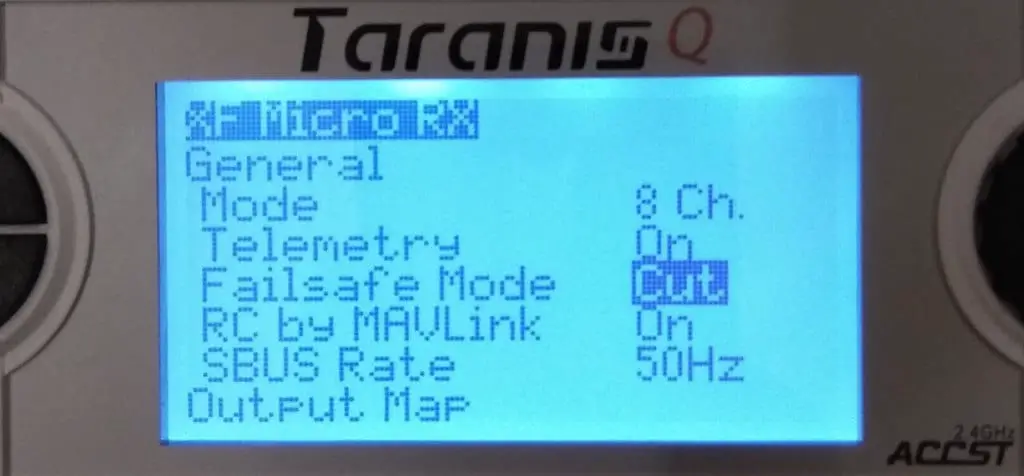
Finally, to configure the channels in your RX, scroll down in the XF Micro RX menu until you see the Output Map options.
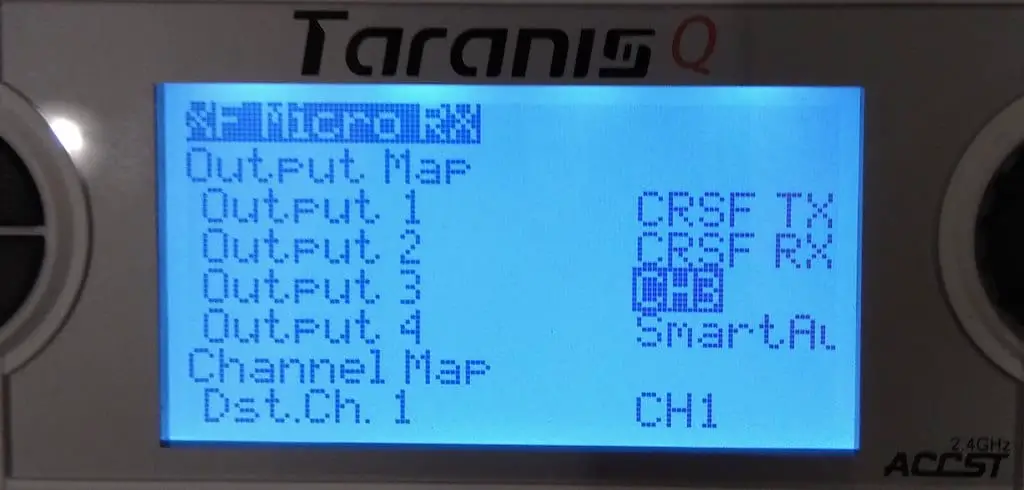
Map Channel 1 to CSRF TX, and once you select that, Channel 2 will automatically become CSRF RX.
That’s it, really, unless you’re using SmartAudio, in which case you’ll want to map Channel 4 to SmartAudio.
Configuring Betaflight to use TBS Crossfire
In the Betaflight Configurator, in the “Ports” menu, enable “Serial RX” for whichever UART you wired the receiver up to.
Hit Save and Reboot.
In the Configuration menu, under Receiver, choose “Serial RX”, and under Serial RX Provider, choose “CSRF”.
Finally, scroll down and enable Telemetry.
Double check the Receiver menu to make sure everything is working fine!
Configuring Raceflight to use TBS Crossfire
You may not be able to use the “Autodetect wizard” in Raceflight, so head over to the Console and type in:
crsf_t3
Then type save.
To enable telemetry, type in:
telem_crsf=1
and type save.
That’s it, the receiver should be detected now and you can check the inputs to make sure they work – you can do this through the “Radio Setup” wizard.
Taranis Q X7 issues with TBS Crossfire Micro
Some Taranis Q X7 users have issues with the TBS Crossfire micro, where they’ll keep getting a “Telemetry lost” warning.
In this case, you can either solder a tiny little component to inside of your radio, OR do a little software mod to get it to work, but with a bit more latency.
Software mod
You are already running the latest night build of OpenTX on your radio, and you have already updated your Crossfire Micro module. In the Taranis, long press the Menu button, then press page till you get to the “Hardware” page.
On the Hardware page, there will be an option for “Max bauds”.
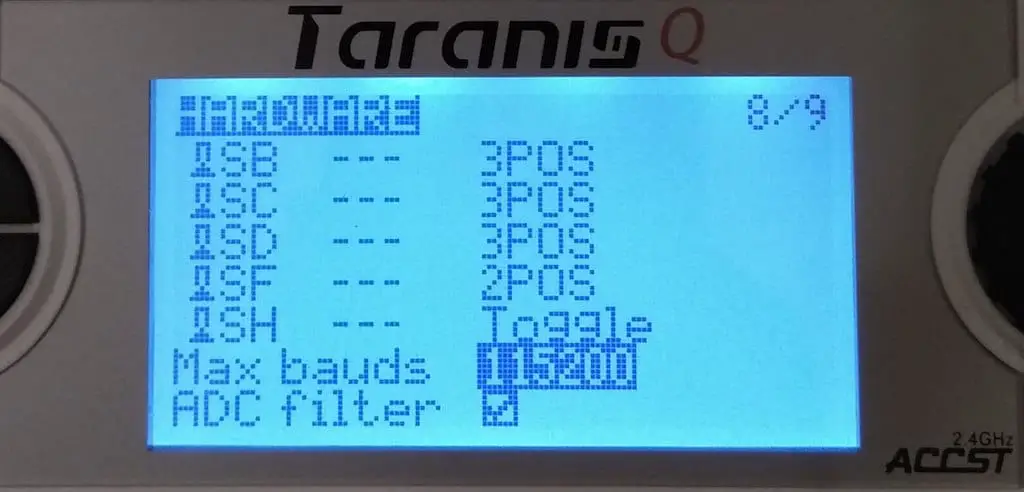
Change the Baudrate from 40000 to 115200. This will slow down the communication between the Taranis and the module, but it’ll fix the issue.
Hardware mod
I have not done the hardware mod yet, but StingersSwarm has an excellent video detailing how to do it:
No luck with connecting tbs micro rx with revolt v2. I have connected to tx 1 (both inverted/non inverted)
URAT 1 soft serial enabled and selected CSRF. Anything I missing?
Why would you need to enable soft serial on UART1?
I followed this video, it was quite helpful: https://www.youtube.com/watch?v=E9yRr9MDoZY
Excellent guide thank you.
For my X7S (opentx 2.2.1) neither of the lua scripts worked (stock and OhmEye’s) until I lowered the baud rate.
Thanks for saving me headaches 🙂
You’re very welcome!
Hey. I got my new crossfire system hooked up and everything works great on Taranis Qx7s but VTX screen on my Taranis is blank. How can I set it up?
Hey, to be honest I was not able to figure out how to get that working either. If I do, I will post an update. Sorry!
Thanks for helping. I thought it was going to be hard to install crossfire but you made it easy understand.
Is there a loss of range using the software mod over the component mod on the qx7? More latency equals more issues at range?
Hi Alex,
There is no loss of range at all. The latency difference is in a few milliseconds, so it’s most likely that you won’t even notice it. Latency is just how fast the command reaches the craft from your radio – 10 ms latency means the craft will receive and act upon your input 10 ms after you give it.
Hello, I have an issue with my Taranis qx7 it’s not binding with the crossfire module. However I was able to bind the crossfire module with the receiver(drone). I did do the modifications myself soldering the wires and installing the telemetry mod. Could it be that I did not solder it properly? I downloaded and updated firmware I just don’t know what else it could be. When I got to crossfire.lua on my sd card and hit execute it shows “ waiting for crossfire”. Anything helps thanks!