Update: I got my hands on a Runcam Split! Keep reading for my review 🙂
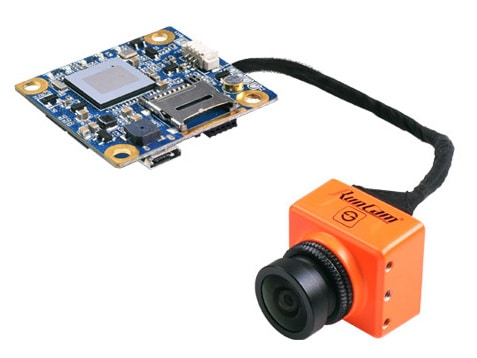
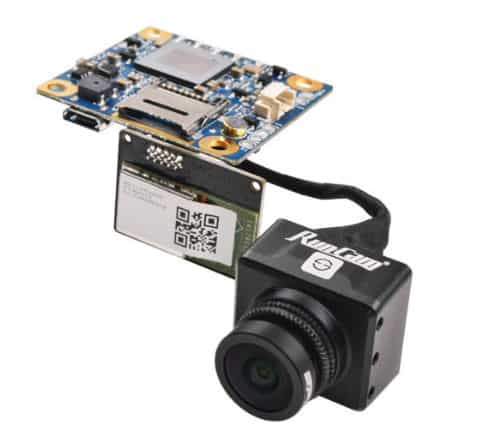
The Runcam Split is a tiny little FPV camera/HD camera combined into one small unit. The camera itself is about as big as the Runcam Swift Mini, and it comes with a PCB that is slightly bigger on the front and back end than a regular 36 x 36 flight controller, but has the usual 30.5 x 30.5 mounting holes, so it’ll fit into any stack without any issues.
Setting it up
The Runcam Split arrived very well packed – Runcam seems to be at the top of their game as far as manufacturing and packaging is concerned, and there were plenty of accessories in the box along with the camera and PCB unit.
- A bunch of velcro straps
- A mount to fit the Split camera unit into a regular HS1177/Swift sized mount
- A bracket to mount the Split directly
- Necessary nuts and bolts plus extras
- Nylon standoffs
- A USB cable
- An extra, longer ribbon cable to attach the camera unit to the PCB
The rig I set it up with uses two carbon fiber plates spaced out enough for an HS1177 style camera – so I just had to screw on the supplied mount, and that mount fit perfectly into the carbon fiber plates – no coaxing necessary!
The PCB I mounted using the supplied standoffs as a third layer, above the PDB and Omnibus flight controller.
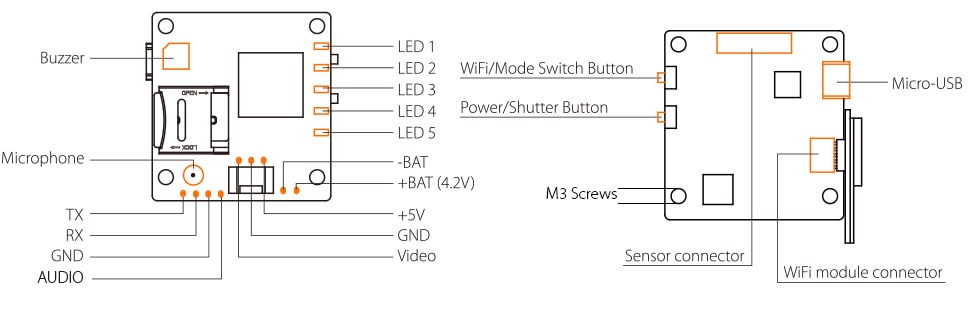
Wiring the Split up was easy enough. There are two options – you can use the plug and supply exactly 4.2 volts through it, or you can use the solder pads and supply exactly 5 volts through it.
There are pads for voltage, ground, and video – which you can solder directly to your transmitter or to your PDB/OSD.
There are also audio pads, but I chose not to use audio for this build.
The one gripe I have with the Split is that it takes strictly 5 volts – yet draws nearly 650 mAh of current, so your VTx power out(if it has one) can’t supply enough power – you will have to wire it directly to your PDB.

That’s what I’ve done – the ground and voltage wires are hooked up directly to 5V pads on my PDB(where the current is not limited) and the video wire goes into my Omnibus FC for the OSD.
The OSD works flawlessly – I had originally thought there may be some hiccups, but the camera works exactly like any other FPV camera – aside from the voltage, of course.
The PDB is designed rather strangely, with the image processing chip and memory card slot on one side, and the LEDs and ribbon cable port on the other.
It’s a little tough to fit the ribbon cable on the downward side, so you’ll most probably have to mount that side up – meaning your memory card will be on the bottom.
That’s fine, except it’ll be a huge pain to remove your memory card if you ever need to do so. The Runcam Split connects like any other mass storage device over USB, though, so it’s not that bad if you’re just going to transfer videos.
HOWEVER.
If you are in the habit of switching out memory cards(as you would on the road), then be prepared for a HUGE pain in the butt.
The memory card slot (MicroSD) is not one of those nice spring slots – it’s one of those pesky slide and lock ones, which means it’s nearly impossible to get the card out if it’s on the bottom side.
Camera image quality
As an FPV camera, the Split image looks and feels like that from the Runcam Eagle. It’s a CMOS sensor but it handles light changes very well thanks to the superb WDR processing Runcam has built in.
There are some folks that say that the increased latency of the Runcam Split can cause a bit of an issue – and while it’s true that the Split does have higher latency than say the Runcam Swift, unless you’re a super high competition racer, you’re not going to notice the difference.
I have done dives and pulled up from inches above the ground without any issue or noticeable lag in the video feed and my stick feel.
As an HD camera, the Split shines. I was expecting the whole footage to be a jellowy mess, but that’s just not the case. With WDR and 60 fps 1080p recording, it can shoot some really nice video.
Note: When you are recording, the FPV feed will have a little flashing red dot(Recording symbol) in the top right – very handy to know that the footage is being saved!
Some people may gripe that it doesn’t shoot 4K video like the GoPro does, but hey, I don’t have nearly enough space on my hard drive for storing a lot of 4K videos, and my 7 year old LED TV does not do 4K either!
The 60 fps footage is super smooth – watch the video below where I compare the Runcam Split against the Runcam 3 and you’ll see what I mean.
Runcam Split vs Runcam 3
That brings me to the next point – how does the Runcam Split compare to the Runcam 3(now discontinued) or the GoPro Hero Session?
The GoPro Hero Session shoots great video, for sure, and can do 4K, and is waterproof – and you can pull it off and mount it on any quad you like.
The Runcam 3 shoots great video, and you can pull it off and mount it on any quad you like.
But both add 70 grams to your setup, and are nearly impossible to mount and fly decently on anything smaller than a 5 inch quad.
The Runcam Split weighs just 26 grams – just a little heavier than a regular FPV camera like the Runcam Swift, and fits right into your FC stack.
It doesn’t stick out like a GoPro, where a bad crash can send it flying and break it, but is instead well protected by the frame(if your frame protects it, that is 🙂 ).
It shoots comparable video – more than good enough quality for a miniquad, and is also significantly cheaper than a GoPro Session.
If you are into flying micros and want to get HD footage, or you are a racer and want HD footage without the extra weight of a GoPro, what’s not to like about the Split?
Just a couple of issues
I already told you about my gripes with the memory card slot.
That leads me to another gripe – if you happen to run out of space on your memory card, a message will display on screen notifying you that you’re out of space.
That’s OKAY, but this message happens to take up the entire screen and you completely lose your feed. I am assuming Runcam will handle this with a future firmware update. This is problematic if you are flying and right in a tight spot, you run out of space, and lose your video signal(effectively)!
Another issue is that the USB power goes both ways – there is nothing stopping the flow of current from the camera into the rest of your setup – so if you plug USB in, your FC will power up, too, since it’s also getting the 5V. One solution is to install a diode between your FC and the Split.
Because the camera angle is so wide on the stock lens, your props will inevitably come in your field of view – at around 35 degrees of uptilt, as you saw in the video above, you can just see the props and motor nuts in the bottom corners of the frame.
Personally, I like it for FPV videos – it makes them more authentic in a way – but a solution is to switch out the lens for a GoPro lens to remove the props from your field of view.
Tech Specs
| FOV | FPV FOV 130° / Recording FOV 165° |
| Video Resolution | 1080@60fps / 1080@30fps / 720@60fps |
| Video Files | MOV |
| Image Resolution | 2 Megapixels |
| TV Output | NTSC / PAL Switchable |
| Real-Time Audio Output | Yes |
| Max Micro SD Card Supported | 64G(need Class 6 or above, recommend Class 10/UHS-I/UHS-II) |
| WiFi Module | Support (Removable) |
| Dimensions | PCB 36*38mm / Lens Module 22*20mm |
Conclusion
Aside from a few minor issues, the Runcam Split is a one of a kind camera that shines as both an FPV and HD camera – and I am planning on using it on many more of my future builds.
- You’ll save nearly 60-70 grams of weight in the process, since you will no longer need an externally mounted HD camera, since the Split weighs just 22 grams
- You’ll save significant amounts of money in the future, as you won’t have to replace broken HD cameras!
- If you do break the lens or the lens unit, that’s just half the camera and completely replaceable
- If Runcam gets the latency right, this may completely do away with HD cameras and FPV cameras altogether!
- Now you can record HD footage from a smaller/lightweight build – more HD race footage!
-


Leave a Reply
You must be logged in to post a comment.