One of the most important components in an FPV build is arguably the FPV camera you choose to fly with. It’s the one connection you have to your craft, and the quality of the camera(and the transmitter of course) will directly impact how well you can fly.
Some things to consider when choosing a camera:
- Latency: The lower the latency, the less lag there is between the feed and real-time. Ideally, you want the lowest possible latency for the best control.
- Lens size: A lower number lens size means a wider field of view. The more you can see, the better you can line up your approaches
- WDR: Wide Dynamic Range is a technology that improves the light handling of cameras. Most good FPV cameras have some degree of WDR, and cameras like the Runcam Eagle do an exceptional job
- Size: There are standard 27x27mm footprints, as well as micro cameras that fit in tighter, smaller racing builds
Here is a quick rundown of the best FPV cameras on the market right now. There are plenty of options, from cheap to mid-range to expensive, and I feel that mid-range is solid, and expensive is great, if you have the budget for it.
Runcam has released a game-changing FPV camera especially for micro builds, the Runcam Split – check out our Runcam Split review for details.
Things to consider
Lens size and field of view
When you are buying an FPV camera, you’ll have a choice of lens sizes, such as 2.9, 2.5, and 2.1. A 2.9 mm lens has a field of view of about 127 degrees, which is the same as a natural human eye. For fast FPV flying, though, 2.9mm may be a little small of an FOV, so consider getting a 2.5mm lens(147 degrees) or 2.1mm(158 degrees).
Personally, I prefer a larger FOV(2.5 or 2.1) because you can see a lot more and that makes it easier to center an airgate or gap in the middle of your view to fly straight through it. You can also tilt your quad further(go faster) and still see a lot more without having to physically tilt the camera as much.
IR Block vs IR Sensitive
If you are going to mainly fly during the day, stick to IR Block, which gives a vivid and bright picture in the daytime, but the image quality at night will be severely compromised.
IR Sensitive lenses will not have as vivid a picture in the daytime(you may not even notice), but it fares better in low light situations. However, for serious night time flying, go for the Runcam Owl Plus(see below).
1. Runcam Eagle 3
The Runcam Eagle is another offering from Runcam which has the same form factor as the HS1177, but with a magnesium-alloy housing which is much more durable and should survive impacts much better.
The Eagle uses a CMOS sensor instead of a CCD, but Runcam says that the picture quality is excellent as there have been many improvements to CMOS technology.
The Eagle is available in a 16:9 version(for goggles that have stretched FOVs like the Dominator V3s) and a 4:3 version(for goggles that have a square FOV).
Check Price at GetFPV
2. Runcam Swift 2
The Runcam Swift is almost the same as an HS1177, but with a wider variety of mounting options, making it much more flexible for a large range of frames. The Runcam Swift 2 is a marked improvement over the earlier Runcam Swift, and I can now say without a shadow of doubt that the Swift 2 outperforms the HS1177 in almost every aspect.
The picture quality is better, the text is sharper, the colors are more vivid, and it has an included OSD which will show you battery voltage. If you’re running a Swift 2, you don’t need any other more complicated OSDs and it certainly shines as a camera. It’s also just $5-10 more expensive than an HS1177, which you’d end up paying more than for an OSD.
The Swift is also available as a micro version for smaller, tighter builds.
Check Price at Banggood
Check Price at GetFPV
3. Foxeer Arrow HS1190
The Arrow is an upgrade from the HS1177. The main reason you’d want this camera over the regular HS1177 is that this camera has a built in OSD(on screen display) which shows you custom text(such as a name), a timer, and battery voltage. As far as FPV racers are concerned, the only data you really need on an OSD is time and voltage.
The Arrow is a little bigger than the HS1177, but most Arrows ship out with a second casing which is the same size as the HS1177, so you can switch out the casing and mount it as you would any other camera, which is a nice touch.
It also has a built in microphone so you can connect headphones to your goggles and listen to the motors as you fly, too.
Check Price at GetFPV
4. Runcam Owl 2
If you are into night flying, the RunCam Owl 2 gives superb performance even in extreme low light conditions. Other cameras will usually switch to black and white in low light, but the Owl stays color for a very long time and even in very dark conditions, will continue to give a very clear picture. The stock Owl 2 has a huge 150 degree FOV, and comes with all the bells and whistles of most other good FPV cameras such as customizable settings and mounting options. The Owl Plus is the same form factor as the HS1177, so it will fit in any build.
Check Price at GetFPV
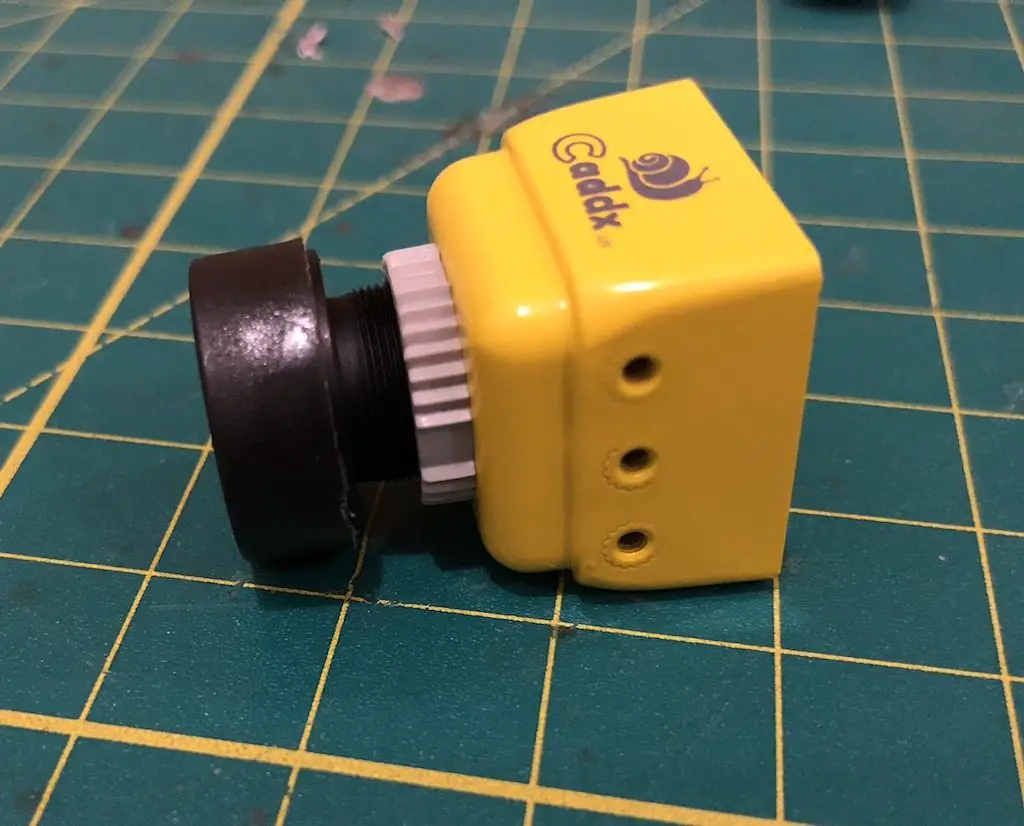
5. Caddx Turbo S1
The Caddx Turbo is a new camera from a company just making an entry on the FPV scene. Their cameras are advertised to have superior latency(some of the lowest possible for FPV cameras) and great WDR and low light image handling. They certainly do very well in front of the sun, as the image returns to normal very quickly even after being bombarded by so much light.
They’re almost the same price as Runcams – a little cheaper in fact – so they may be worth a shot if you want to try something other than Runcam. Otherwise, they’ve got all the features you love in Runcam – an OSD, wide voltage range, and great form factor. Read full review here
Check Price at GetFPV
For Tiny Whoop style builds
For really tiny micros, you want to get a camera that combines the video transmitter with it into one lightweight unit, since you don’t have the weight allowance or space to fly something heavier.
There are plenty of options here, and most of them have similar performance.
You won’t need anything more than 25 mW for a micro. There are 200 mW transmitters too, but they get really hot, and you really don’t want to fly a micro that far out. Remember, if you crash, you have to go look for it!
awesome tips, how should i proceed to mount HS1177 or even one of the others cams here suggested on a ZMR250 frame, looks to me they are quite small O.o …. do they actually fit?
Small is not an issue – you’ll have problems mounting if it’s too big 🙂
Just fill up the extra space with some foam, or find a 3D printed mount on Thingiverse.