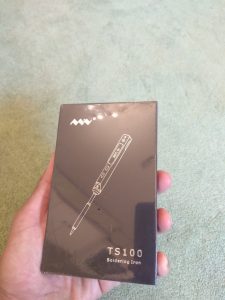
In all the years that I have been building, flying, crashing, and rebuilding drones, I have learned one thing for sure: a good soldering iron is the fine line between frustration and fun.

When the TS-100 soldering iron first came out, I saw how excited everyone was about it but didn’t think too much into it until I actually got it(received it as a gift from a family member).

Let me tell you, a temperature controlled soldering iron is TRULY the way to go.
I now use the TS-100 for nearly all of my soldering, even at home on the bench. Really, the only thing it can’t handle very easily are large solder pads on PDBs, for which I use an old 60W iron I have lying around.
At this point, you may be wondering how a simple soldering iron warrants an entire review. I’m going to break it up into a few parts, starting with portability.
Portability
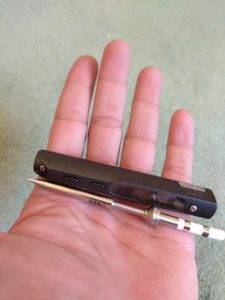
The TS-100 is an incredibly tiny soldering iron compared to most others you can pick up on Amazon or elsewhere. At its heart, it’s meant to be a field iron.
This means you can be flying at your usual spot(where you may have even hiked to get to), crash, detach a wire, and be able to solder it back on right then and there.
I can’t tell you how many times I’ve had to go back home because of a broken wire before I had this iron.
Because it’s so tiny, it’s also really easy to store. Technically, you can just loosen a bolt and remove the metal element altogether to make it even smaller, but I leave it in, as it’s still just about the same size as a hex driver so it fits easily into my tool case.
The one qualm I did have with the TS-100 is that it does not come with a wire. You’ll need to pick up a barrel connector from eBay or someplace and solder an XT-60 or whatever onto it. Then you can just plug in a lipo and power it up.
Temperature control and smart features
The second thing that makes the TS-100 such an appealing soldering iron is that it is programmable. There is even a USB port where you can upload custom firmware(which seems like overkill, but it is an interesting addition).
When you apply power to the iron, it does not automatically start heating up. This is a good safety feature as you can leave the iron plugged in and only crank up the temperature when you need it.
With the push of a button, you can start heating – depending on how much voltage you are supplying, the iron takes anywhere from 30 seconds to a minute to reach 400 degrees Celcius, the max supported temperature. You can set the temperature to whatever you wish.
A temperature reading is essential. With normal irons, you’d just have to idle around until you could touch the solder to the tip and it melted fast enough that you knew it was ready to go.
Here, just wait for the temperature reading to get to where you need it, and start soldering!
Another incredibly smart feature built in to the TS-100 is an accelerometer.
When you’re working on a quad, there may be a time where you’ve got a hot iron lying around but you’ve got to adjust some bolts or strip some wires before soldering again.
If you leave the iron hot for too long, the tip of the iron begins to oxidize due to high temperatures and the oxygen in the air. This eats away at the tip and makes it lose its heating capacity.
If you leave the TS-100 lying idle, it will decrease the temperature to 200 degrees C, sort of a standby mode.
200 degrees C is definitely not safe enough to touch(so you should still be careful there), but it is cool enough that the tip won’t oxidize as quickly.
To get the iron to heat up again, simply pick up the iron, and as the accelerometer picks up movement, it will realize that you’ve picked it up again and it will heat back up to your set temperature.
How cool is that!
How to power the soldering iron
Since the TS-100 does not have a power adapter or cable, you’ll need to pick up a barrel connector and make your own power adapter.
According to the spec sheet, you can use anywhere from 12 volts to 28 volts to power the iron(3 to 6 cell lipos). You can also use an adapter or a power supply that outputs those voltage ranges. I used an adapter from an old router I had lying around for soldering at home, since it’s easier to plug it directly into the wall rather than use a lipo every time.
For field charging, I use a 4S lipo.
I have two power adapters for the TS-100 – one from the router, and one which I made with a barrel plug and an XT-60.
Remember to keep a long length of wire between the barrel plug and the XT-60, as a longer wire will allow for easier movement – otherwise you’ll be restricted to how you hold and move the iron.
How to maintain your soldering iron
It is very important in order to keep your iron operating at optimal capacity to take care of it. Solder, dirt, and grime can stick to your iron’s tip and eventually become a permanent coating, which will make it very hard for the heat to transfer correctly.
It’s very important that you wipe your iron on some copper(solder wick or wool) or even a damp sponge to get any older solder off, as well as dirt/flux off of it. Once the tip is clean, it’ll be nice and shiny, and you can apply some fresh solder to start soldering again.
Leave a Reply
You must be logged in to post a comment.