I never thought I’d spend more than $20 on a video transmitter before, but after watching Joshua Bardwell’s video on why you NEED SmartAudio, I thought I’d give the TBS Unify Pro a try.
SmartAudio or not, the Unify Pro by itself is a beautifully engineered piece of equipment and it would totally be worth using it on all future builds, even if it adds $30 to the bottom line. What’s also neat is that it comes either SMA or RP-SMA so you can match it to your existing collection of fpv antennas.
Why you need a good VTx
I’ve already written about why you need to spend good money on a decent FPV camera, but I didn’t follow my own logic up until now that you’d need a good video transmitter along with your good FPV camera!
Video transmitters are quite finicky pieces of equipment, and I’ve had plenty of times where I thought I was transmitting on a given channel but I was really transmitting a couple of megahertz up or down.
That made a huge difference in my reception, and I’d have lots of static and noise – mostly because I had no idea what channel I was actually transmitting on, and I was guessing what channel to receive on.
This doesn’t matter too much when you’re flying alone – though the mismatched frequency becomes irritating – but when you’re flying with other people, especially at a race, it can completely throw other people off and will also make it hard for the race organizers to see your feed.
Not to mention the cheap VTxs don’t output the cleanest signal, either.
The TBS Unify Pro V2

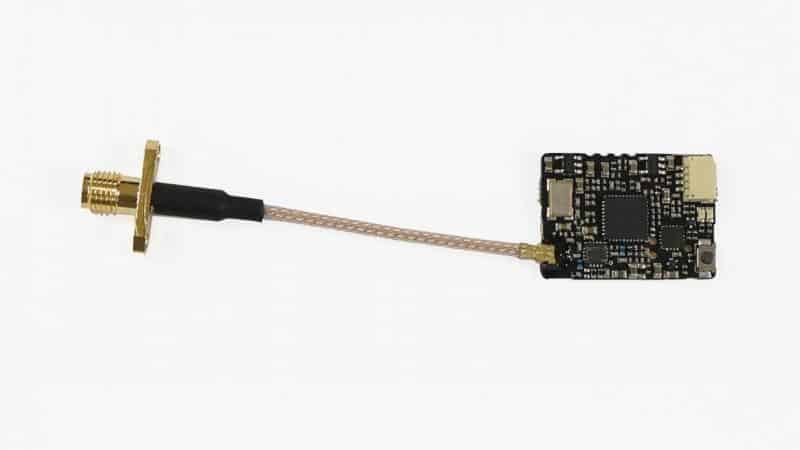
The Unify Pro V2 is an awesome, tiny little transmitter that has a button to control channels/frequency/power and a pigtail that connects to the antenna.
There are two versions:
- Race version, where the max power is limited to 200 mW and switchable from 25/200
- HV version, where the max power is 800 mW!
It takes anywhere from 2S-6S, and there is a video in, audio in, and another set of 5V and ground wires to power an FPV camera.
The video feed was nice and clean! Here’s some sample video. Note that I’m standing in the direction the copter takes off, and when it goes behind the tree into the field, my head is in the way of the antenna, as is a little metal swing and the tree itself.
When I set it up on my copter, I soldered the power into the TBS Unify Pro from a 12V out on my PDB, the video went to the video out port on my Omnibus F4, and the audio wire(for using SmartAudio) to any free TX port on a UART on the board. I soldered it to the TX6 port, which was UART6.
Note: I first screwed this up by using the same UART that the SBUS port used – make sure you use a different UART!
I clipped the 5V out wire and the extra ground wire, since I didn’t need it.
The 5V out is only around 500 mAh, so it’s not enough to power a Runcam Split, and HS1177s and Runcams usually require at least 2S.
The pigtail is a little finicky.
It’s got two little screw holes on the side that you can use to screw directly into a frame that has the mounting holes, or you can use a 3D printed mount, too.
This design is actually ideal for a frame like the Armattan Chameleon.
The way I mounted it on my FPV Frenzy Stretch 220 was I used double sided tape to stick the Unify Pro to the top plate, then did a small loop in the pigtail, attached the antenna, and ziptied the antenna to the top plate through the zip tie slots.
This was pretty secure in itself, but for an added layer of security, I also zip tied the Unify Pro to the top plate.
Pit mode
The really awesome feature (and a huge convenience in races) in the Unify Pro is called Pit Mode, where you can power up and configure your settings and everything but you’re not transmitting enough power to get your feed mixed up with anyone else’s. This way you can set everything else up(including your quad) while other people on the same frequency are in the air, and once they land, disable pit mode and start flying.
Setting up SmartAudio
SmartAudio is a super cool feature of the TBS Unify Pro which uses the audio wire on the transmitter to change settings remotely(instead of using it as a regular audio input). With SmartAudio, you can change channels, bands, and even transmit power all from your radio.
To set up SmartAudio, you just need to enable it under the “Peripherals” tab in “Ports” in the Betaflight configurator. Make sure it’s with the corresponding UART!
Next up there are two ways to actually use SmartAudio:
- Through the Betaflight OSD
- Through Telemetry using a LUA script
Setting it up through the Betaflight OSD is the easiest way to go. If you are already using the Betaflight OSD, then you just need to select the “TBS SmartAudio” option from the “Peripherals” tab as I mentioned above.
Once you’re in the OSD, it’s pretty easy to access:
Using a LUA script is a little bit of a longer process, and you’ll need a telemetry enabled receiver for your Taranis to be able to use it.
Here’s a quick step by step(I’m including two of Joshua Bardwells’ videos below in which he gives a much more detailed explanation):
- Connect the SmartPort wire from your FrSky receiver to any free TX UART on your flight controller(you can use the same one as your SBUS, since that is an RX port)
- In the Ports tab in the Betaflight Configurator, enable “FrSky” telemetry under the Telemetry tab for your corresponding UART
- Enable “Telemetry” in your Configuration tab in the Betaflight Configurator
- Flash Open TX 2.2.0(or greater) with the LUA script bundle to your Taranis using the OpenTX companion
- Install the Betaflight LUA script and configure it to appear on your Telemetry screen for your model in the radio
- You can now control the PIDs and VTx settings from your Taranis!
Conclusion
The TBS Unify Pro is definitely an awesome video transmitter as it outputs clean video and is really convenient to setup and use. It’s a little bit on the expensive side, but when you consider the clean video and the convenience it provides, it’s totally worth it.
Hi, that was an awesome explanation. However I’m not worthy enough to own a Taranis system. I have a Spektrum Dx7s and I’m using e the fpv race serial rx. I have it connected to the sbus for the signal. Weird but it works. Can you tell me how to wire this properly if I need to take it off of sbus yet still access the smart audio channel switching technique? I’m super novice so heads up lol. But I’ve gotten my quad flying and would love to not have to disassemble to switch channels or wait until one is free. Also I’d like to know if you can go in depth of accessing Pit mode. Thanks again! Great write up!
Hi Ryan, thanks for your nice comment!
You’d have to see if there is telemetry on your receiver – it doesn’t matter if you are using SBUS or PPM, you just have to have telemetry connected from the receiver to the flight controller and configure that in Betaflight, and the Smart Audio wire connected to the flight controller too, of course.