One of the most frustrating things for me in building my earlier quads was finding a good place to mount the FPV antenna. Back then, designers and manufacturers didn’t really care about including some design features to mount antennas, and as a result, I must have broken tons of antennas and transmitters.
Nowadays many frame designers do include some form of antenna mounting solution, which keeps the antenna secure and prevents it from breaking in a crash very easily.
I’ll go over some of the methods you can use, and talk about how effective they have been for me.
Option 1: Zip tie to the top plate
This is the method of choice for most people, and it is indeed a very practical and secure way to mount your antennas. The ImpulseRC Reverb and the Skitzo NOVA frame both utilize this mounting style, and FinalGlide(Reverb designer) and Skitzo(NOVA designer) have been in FPV from the very beginning, so their experience is certainly worth relying on.
Most frames will have some kind of slots on the top plate that you can use to secure the zip tie around.
This method works fine for both pigtails and transmitters where the connector is soldered directly onto the transmitter. However, I’ve found it to work best when you attach the antenna first, then zip tie the entire pigtail and antenna or transmitter and antenna to the plate using the slots.
Be sure to use a strong zip tie, or else there will be some wiggle room left and the antenna will wobble a little. Also, if there is more than one slot, use them all to get the most secure fit possible.
Finally, try to keep as much of the antenna inside the frame as possible(but make sure the main element is open in the air). This way, there is less chance of something bending and getting into your props in a crash.
The only disadvantage here is that you’ll have to remove the top plate any time you want to change the antenna. That being said, I don’t remember breaking an antenna for quite a while now, so…
Related: Check out my favorite antennas
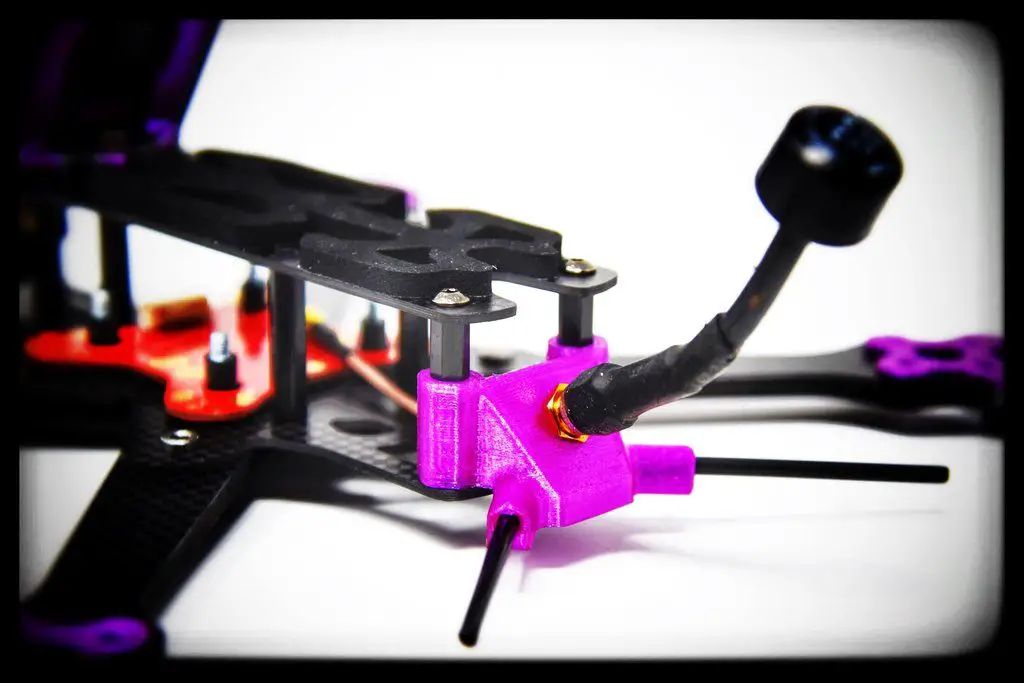
Option 2: Use a 3D printed mount in the back of the frame

A lot of frames, including the MQC frames that Le Drib flies and the Armattan Rooster and Chameleon have a 3D printed or carbon fiber plate that sits perpendicular to the top plate. The connector fits through the plate, and the antenna sticks out straight from the back of the frame.
This is also a really good way to mount your antennas because it keeps the connector secure in the frame, and makes it very easy to put on and remove the antenna.
3D printed mounts are usually printed with TPU, which is almost indestructible thanks to its flexibility. The only issue that I experienced with a 3D printed mount was that the antenna tended to wobble up and down a little. It wasn’t bad, and wasn’t visible in the HD video as jello, so I suppose that’s forgivable.
If your frame doesn’t come with a 3D printed mount, chances are someone has designed it. You’ll be able to find it on Thingiverse.
Option 3: Mount antenna vertically from the top plate
This used to be the method of choice back in the day, when frames had a little SMA hole on the top plate you could thread the connector through and then screw the antenna on.
Many people still do it this way, but in most cases, I don’t recommend it. In a crash, the force will almost certainly snap your antenna from the connector.
I’ve broken tons of antennas this way.
However, if you’re using a stubby antenna like the Lumenier AXII, you can certainly mount your antenna this way as there’s just not going to be enough leverage to snap the antenna in a crash.
Plus, if you top-mount your battery, the antenna will be totally protected from any crash. Just don’t expect to get lots of range, since the antenna is so close to the carbon fiber.
Option 4: Mount antenna vertically from the bottom plate

This mounting method is much less common, and I last saw it in Kabab FPV’s Floss frames. I don’t believe the current Floss frame has it, but a previous version did have it.
The only way this would work however is if you have some clearance between your propellers and the frame body, so for a 5 inch frame, at least 215 mm or more wheelbase.
You can use a right angle connector to run the pigtail down below the frame, and the antenna would fit snugly right next to the chassis.
Option 5: Mount a light antenna directly from the VTx
Finally, the last way you can do it is by using a light antenna like the AXII and instead of using a pigtail or SMA/RP-SMA connector, use a U.FL connector or MMCX connector to directly plug the antenna into the VTx.
Then you can simply run the antenna out wherever you want it to be and secure it with a zip tie or some double sided tape.
Important: FPV Antenna orientation
This striking and informative video by Alex Greve should open your eyes about FPV antenna orientation. The placement is one thing, but the best way to orient your antenna is 45 degrees – no matter how you attach it to your quad.
In the video, Alex compares two antennas, one mounted at 45 degrees and one mounted horizontally, and the 45 degree one has far better reception than the horizontal one.
Conclusion
These are 5 methods that I’ve seen, used, and found to be most effective. Of course, the beauty of building quadcopters is that there are tons of ways to get to a given solution. Have you tried any other methods? Which ones have worked best for you?
Leave a Reply
You must be logged in to post a comment.